Butter

All posts tagged Butter

Chocolate Dream Cake

Published June 15, 2015 by thepinkgourmet

If you are looking for a rich chocolate loaf cake, this is the one for you! It is very moist and very easy to make.  Another good thing is that it makes 2.  You could keep one for yourself and give one away, or you can eat them both.

IMG_4959

Chocolate Dream Cake – Source

Prep Time: 10 minutes
Cook Time: 60 – 70 minutes
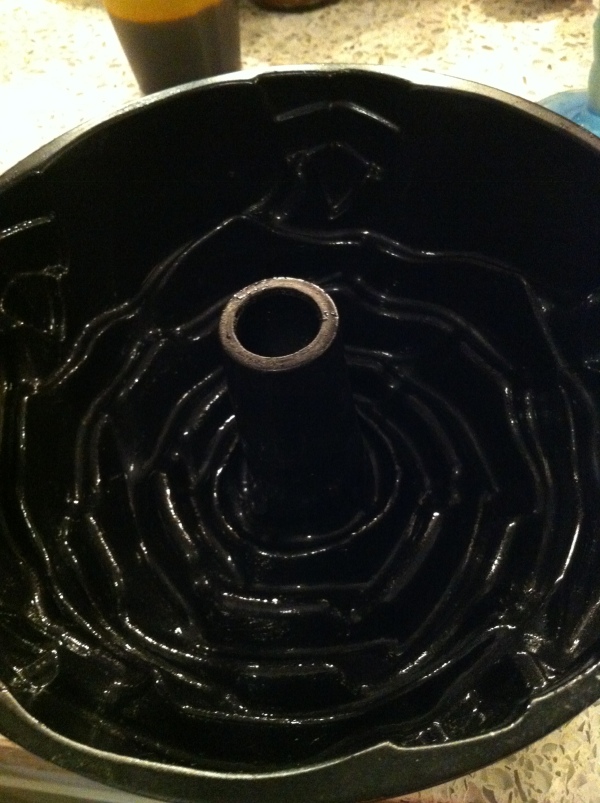
Yield: **** Makes TWO Loaves
You will need a 10-in (25 cm) Bundt pan or two 9 x 5-in (23 x 13 cm) loaf pans.

INGREDIENTS

1 cup  Milk
1 cup cocoa powder
1/2 cup plain yoghurt, (not fat-free)
3 cups all-purpose flour
1/2 tsp baking powder
1/2 tsp baking soda
1/2 tsp salt
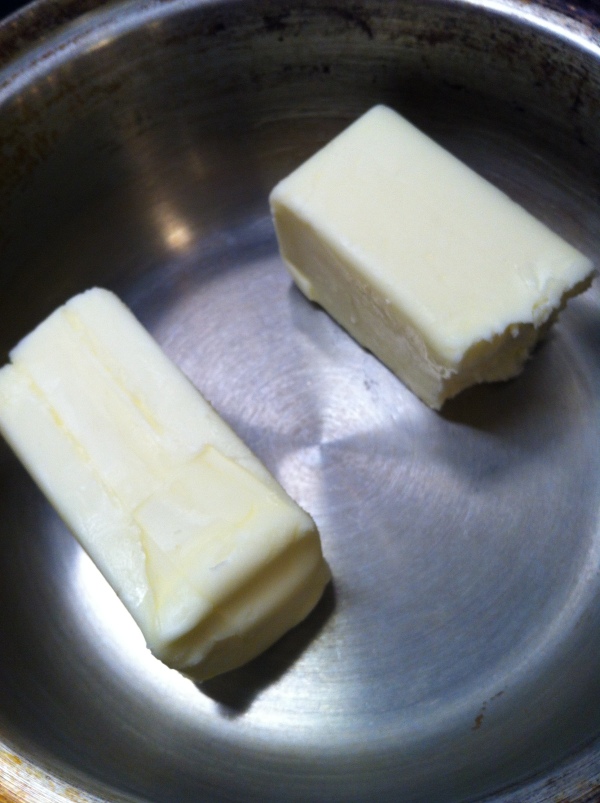
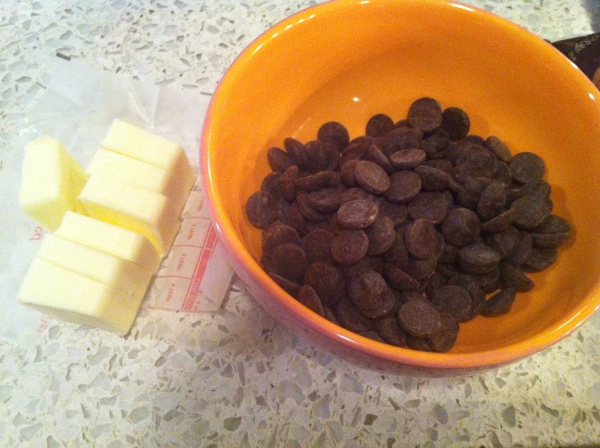
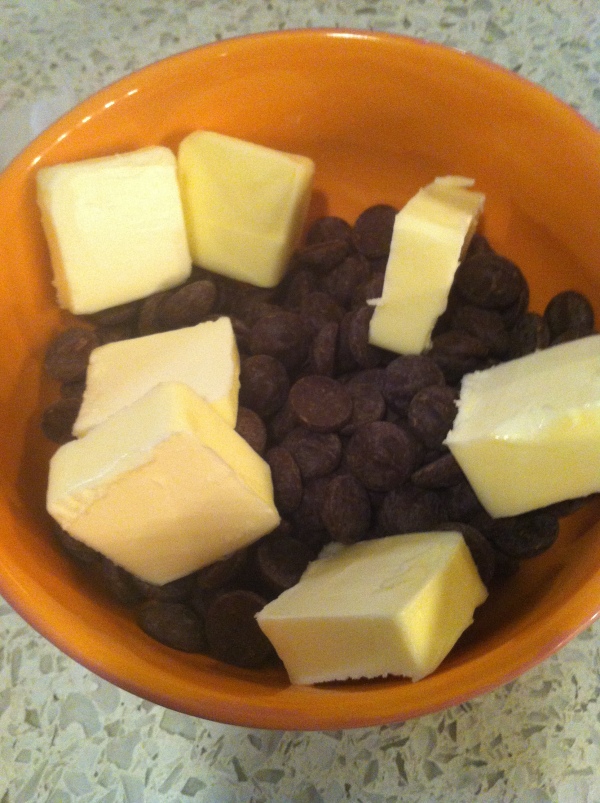
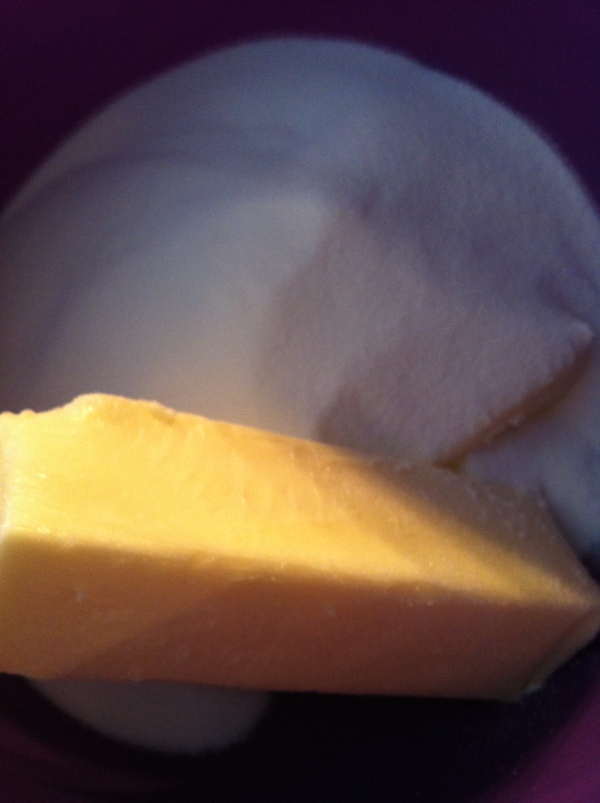
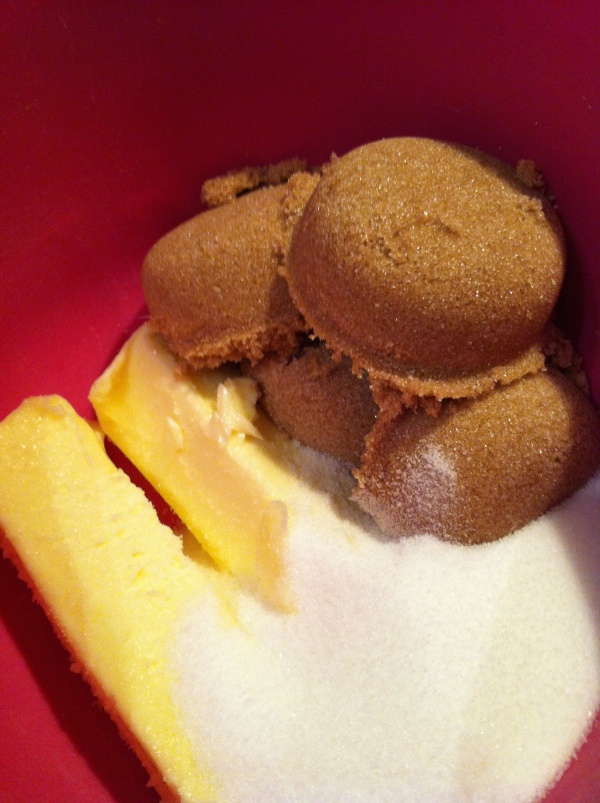
3/4 cup  butter, softened
2 cups sugar
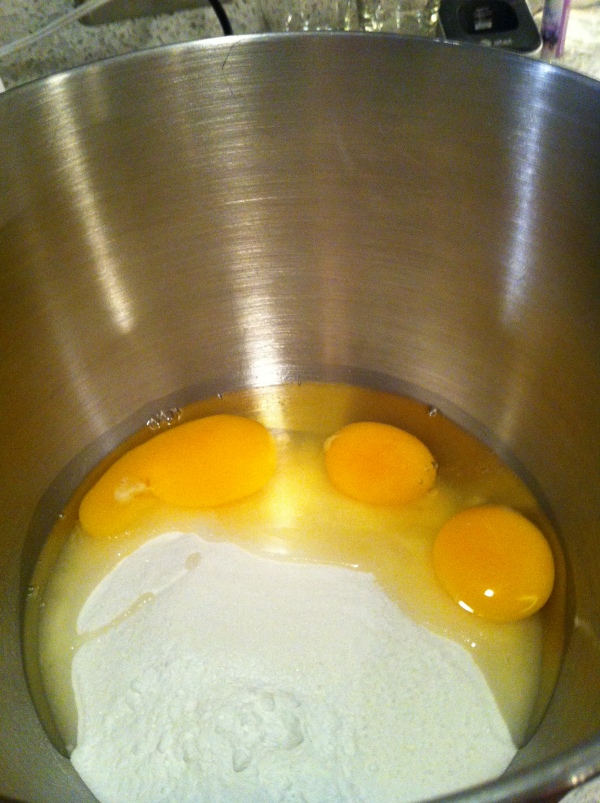
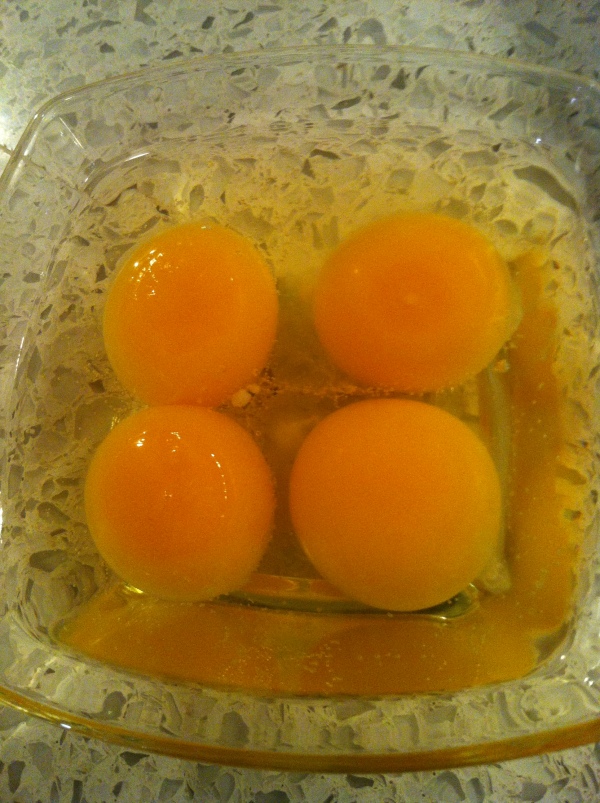
4 eggs, at room temperature
1 tbsp vanilla extract
1 cup semisweet chocolate chip

INSTRUCTIONS

1. Preheat oven to 350 °F (180 °C). Butter a 10-in (25 cm) Bundt pan or two 9 x 5-in (23 x 13 cm) loaf pans.
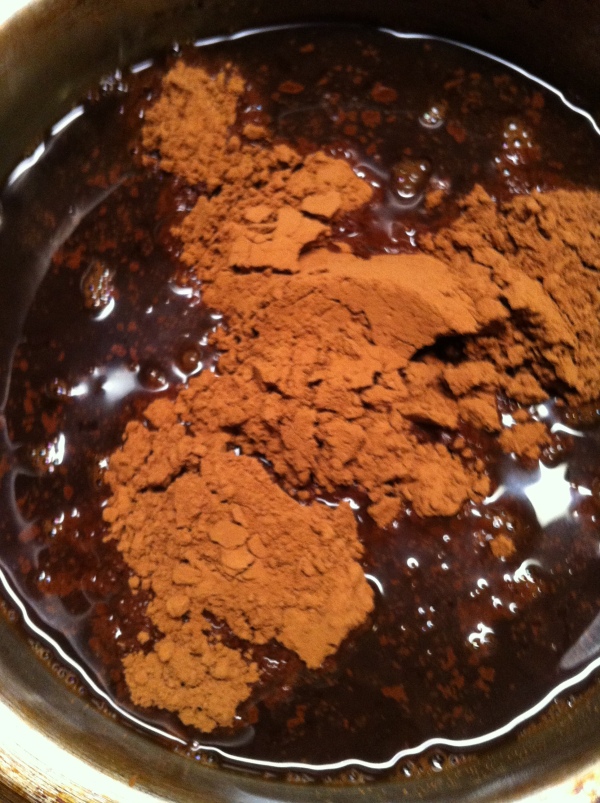
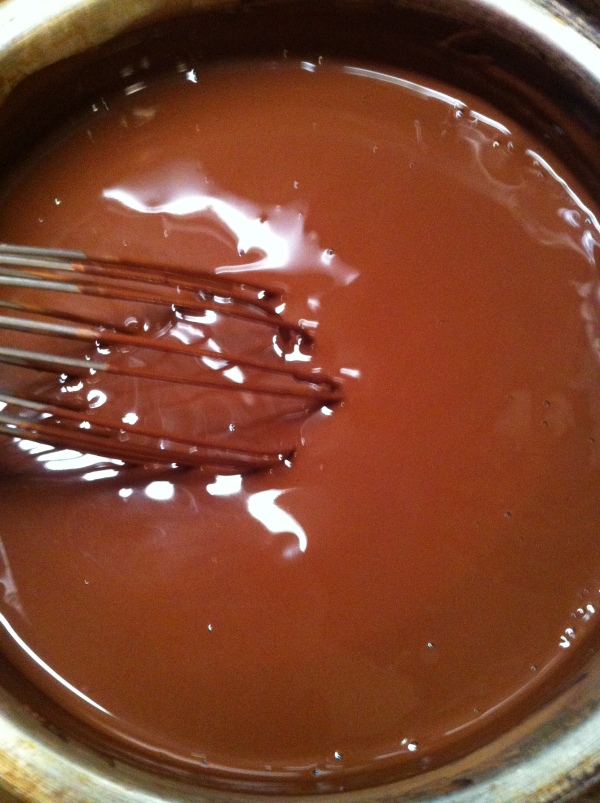
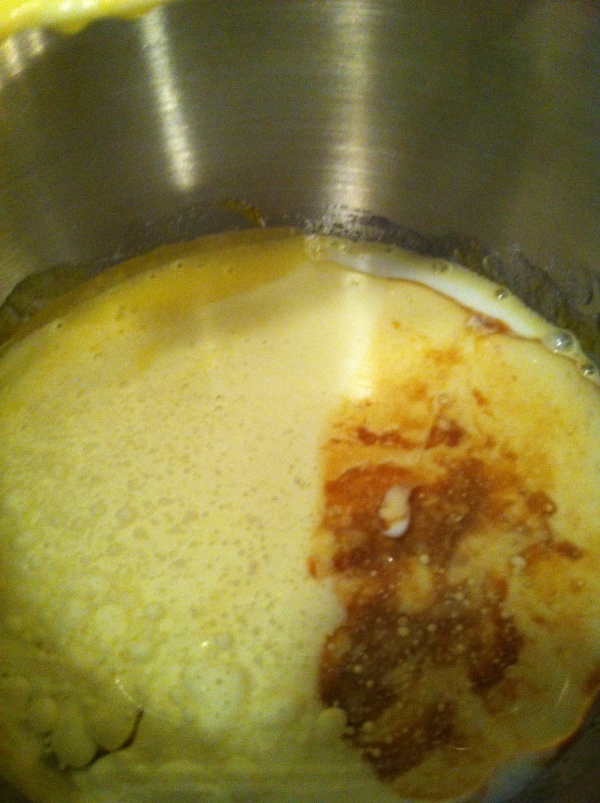
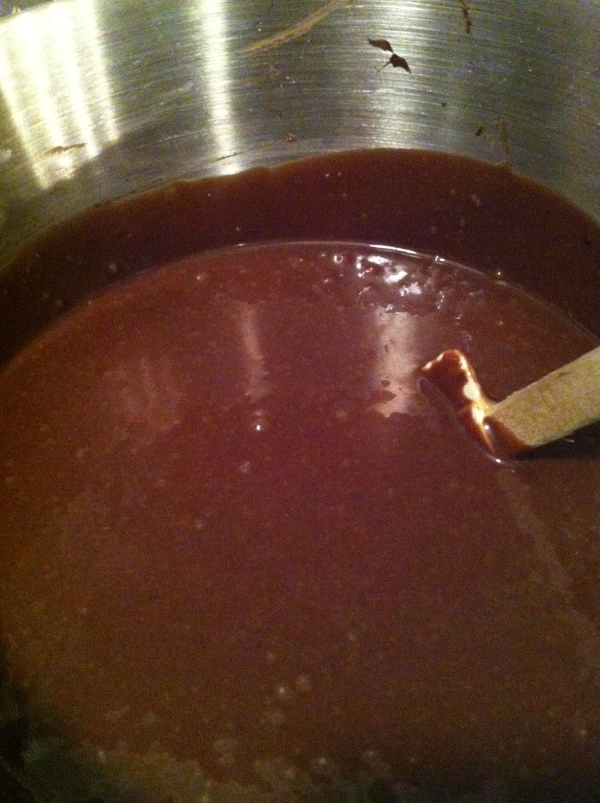
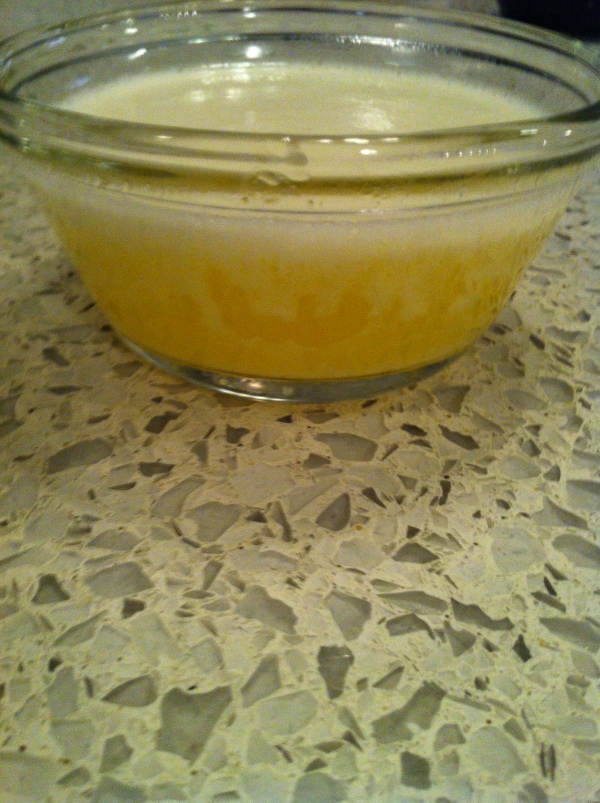
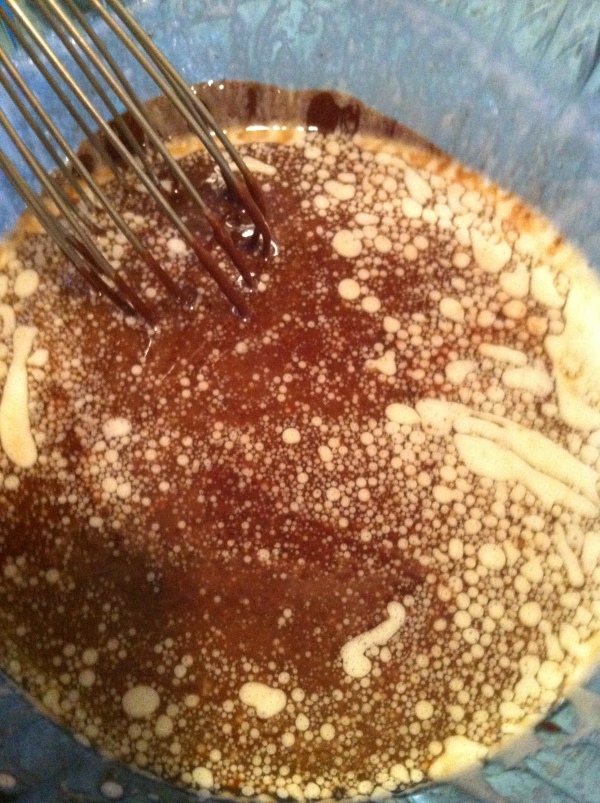
2. In a bowl, gradually whisk milk into cocoa powder to make a smooth paste; whisk in yoghurt and set aside.
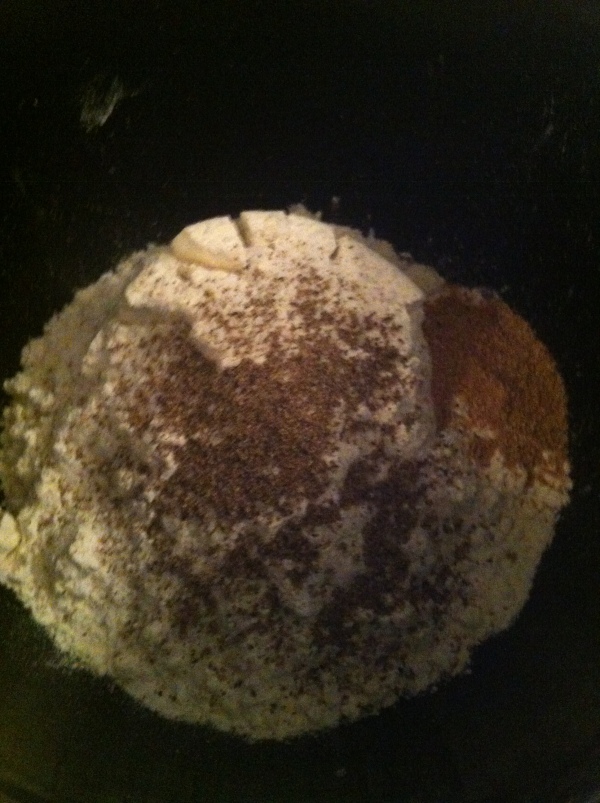
3. In another bowl, combine flour, baking powder, baking soda and salt.
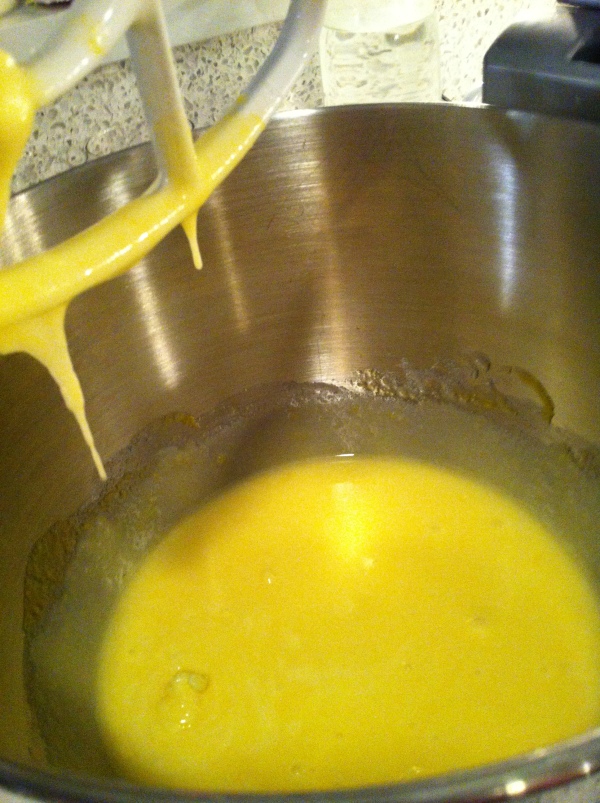
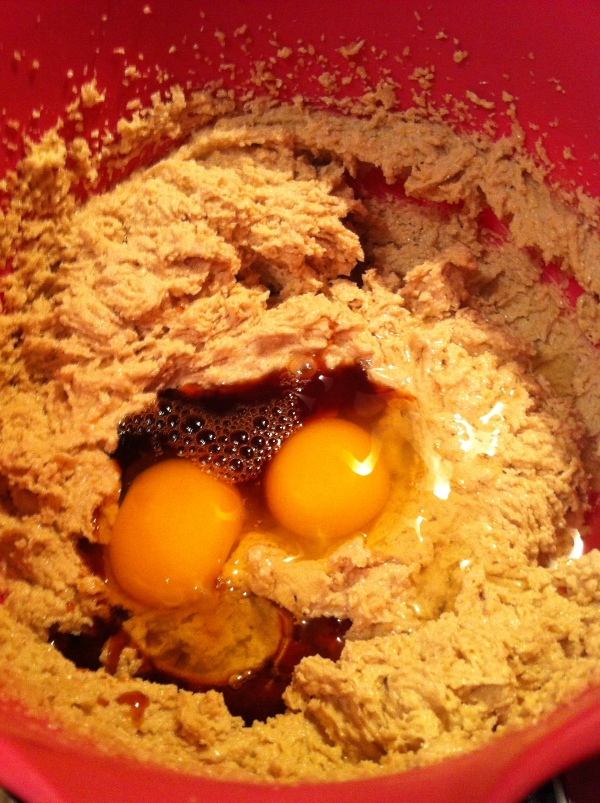
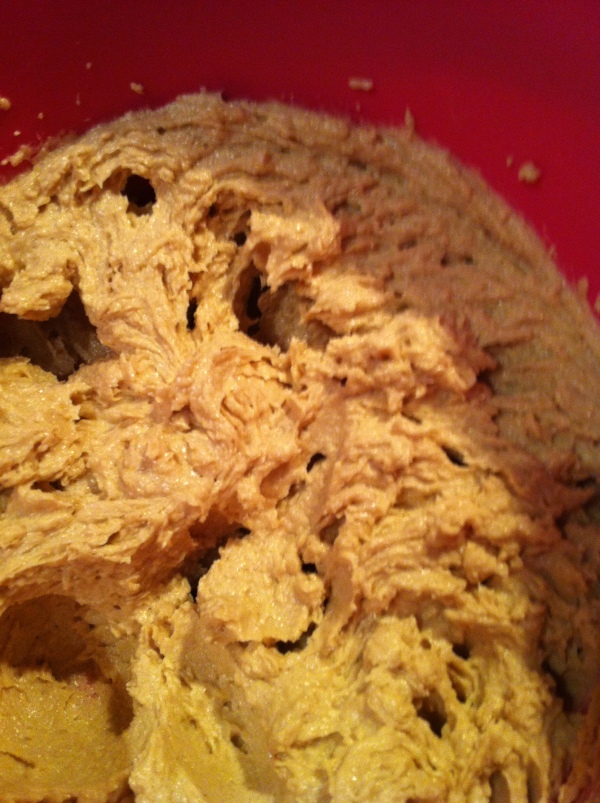
4. In a large bowl, using an electric mixer, beat butter with sugar until light and fluffy; beat in eggs and vanilla extract.
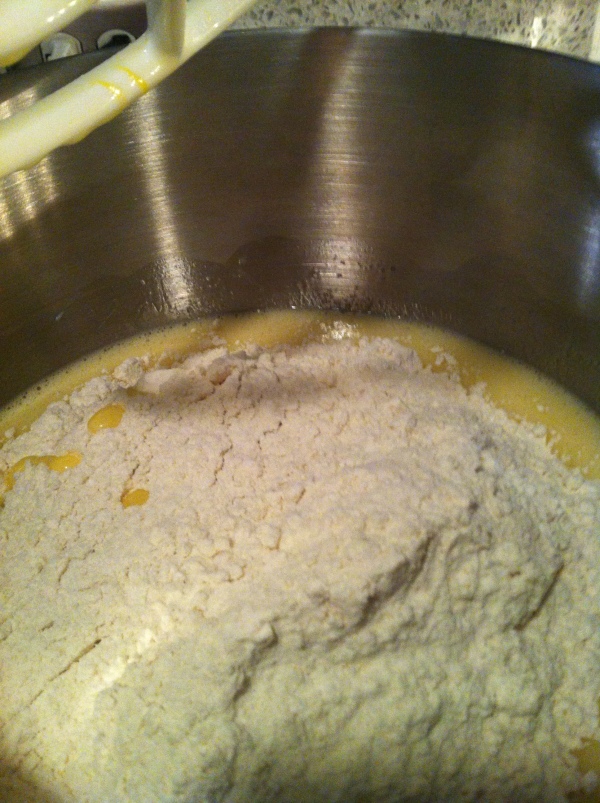
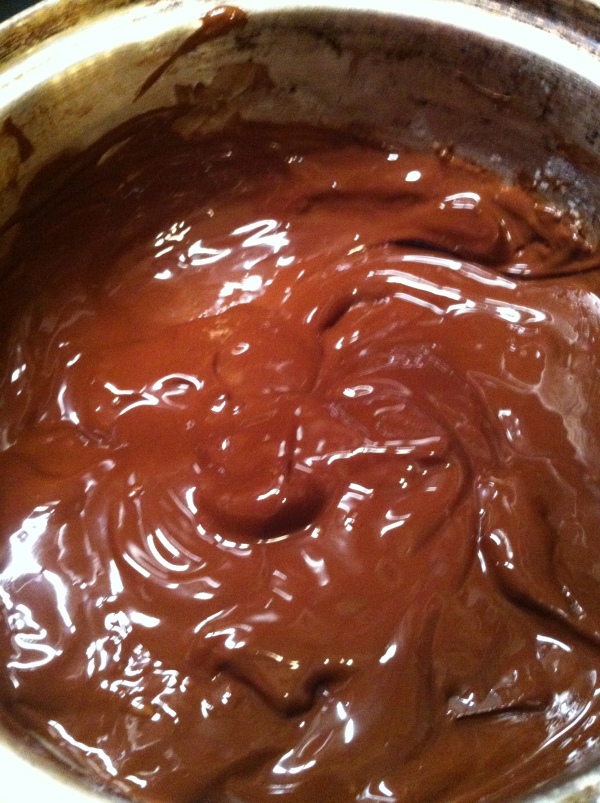
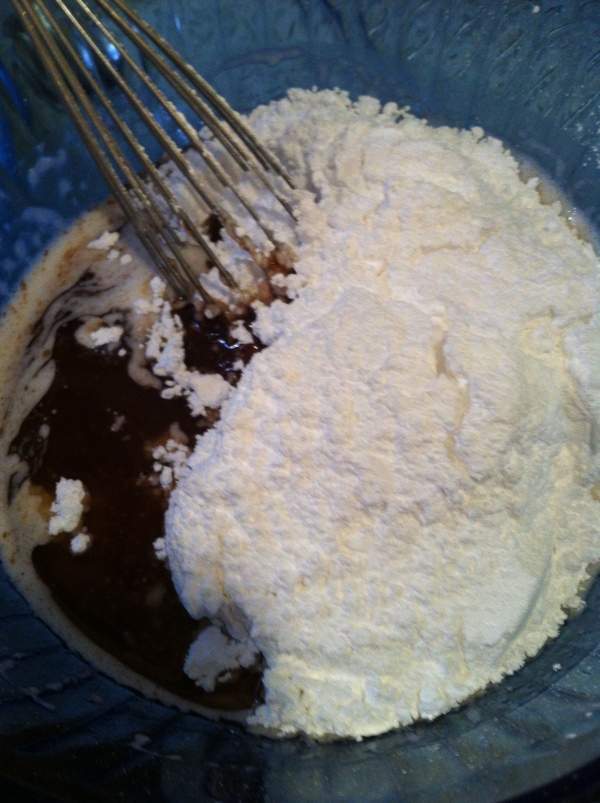
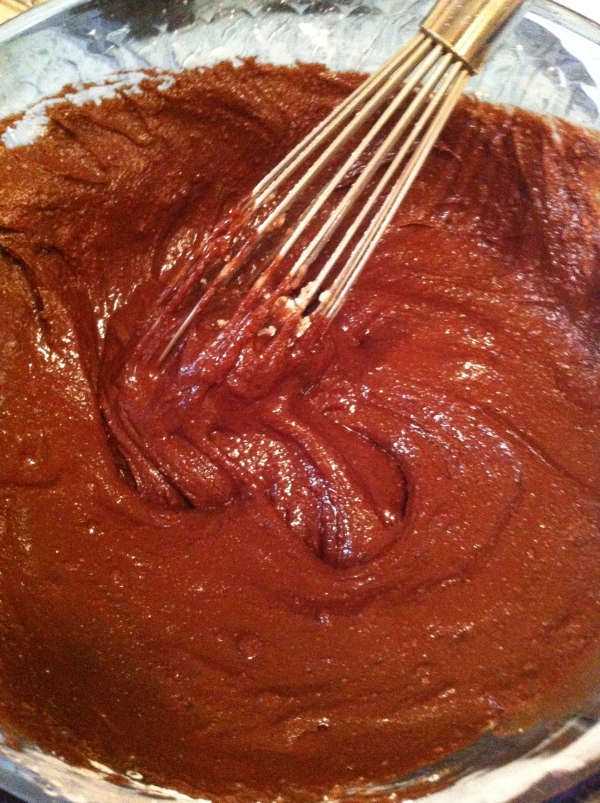
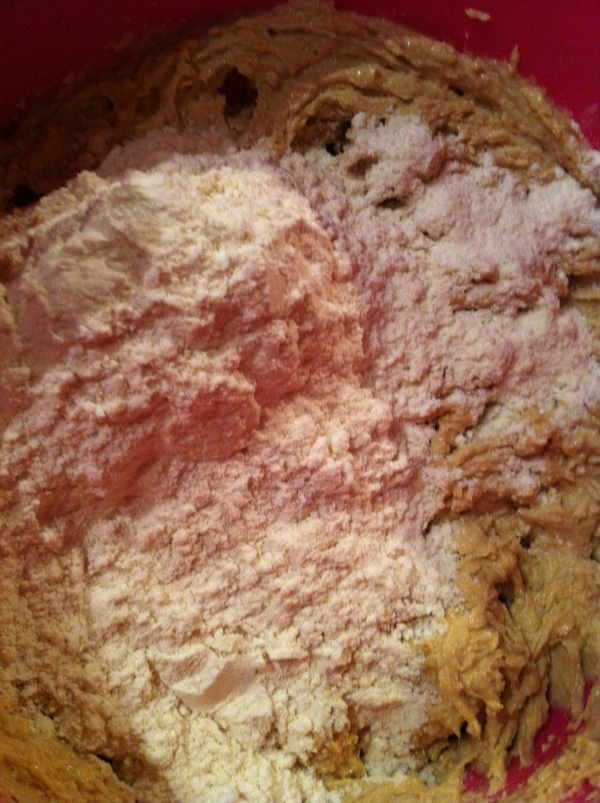
5. Using a wooden spoon, stir in flour mixture alternately with milk mixture, making 3 additions of flour and 2 of milk. Fold in chocolate chips.
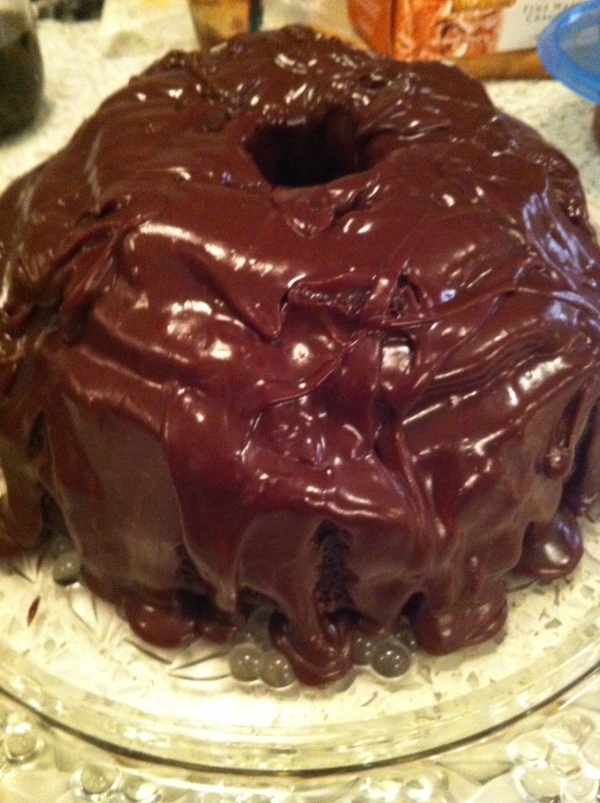
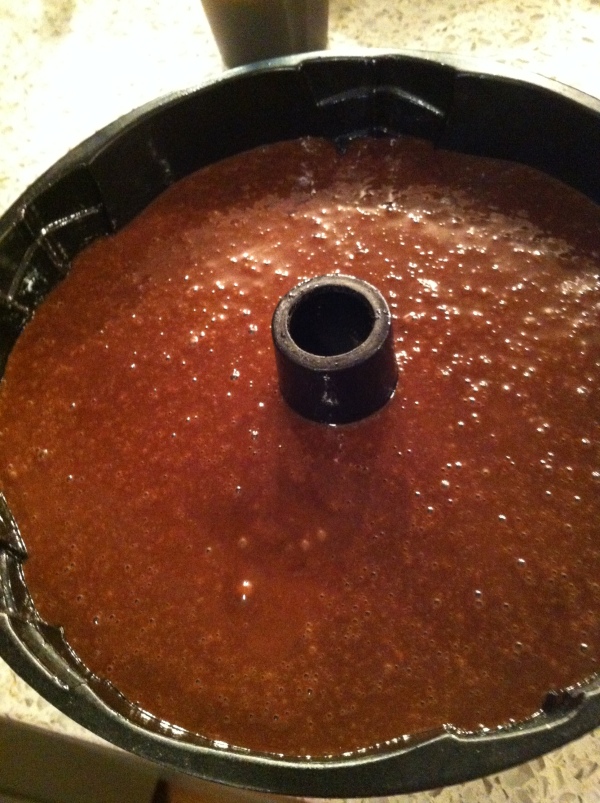
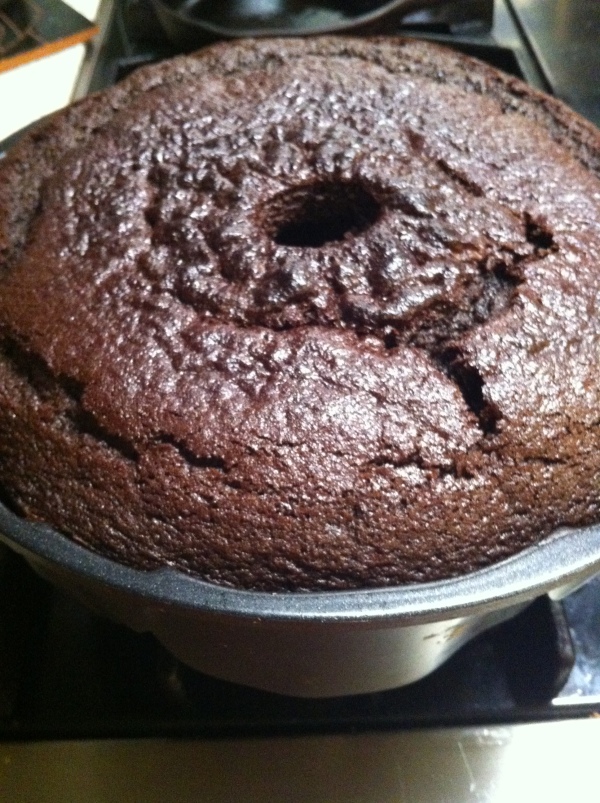
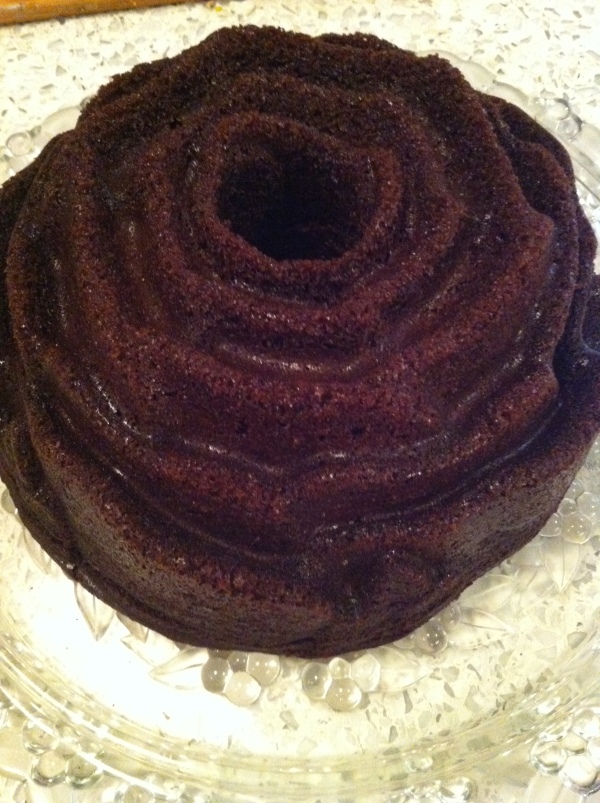
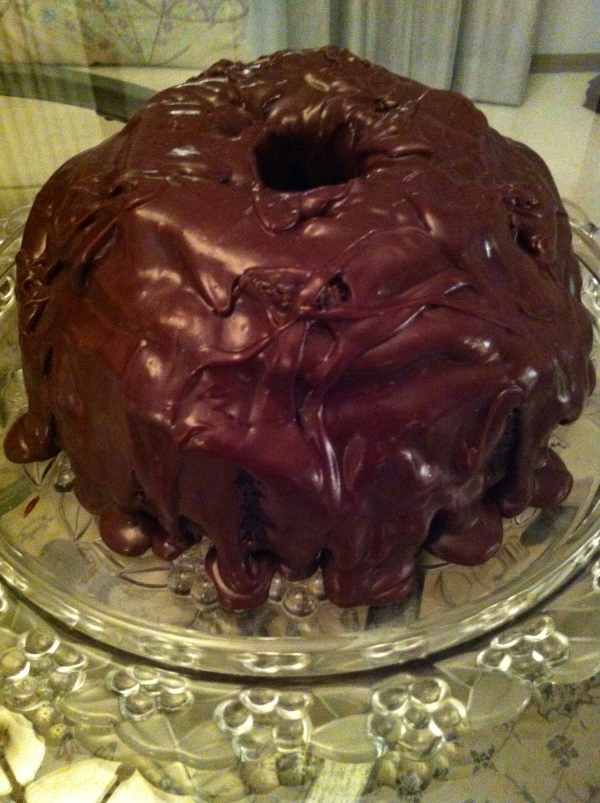
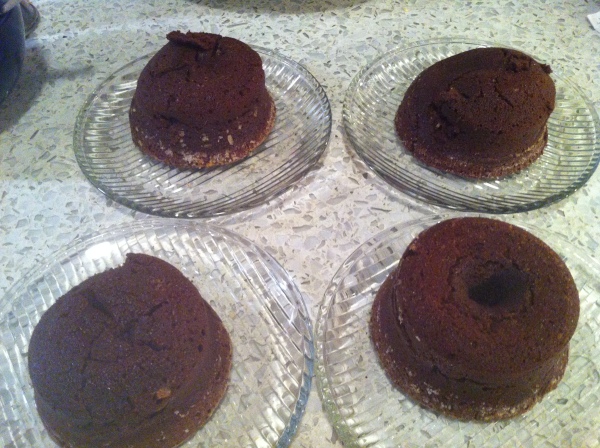
6. Spread into prepared pan, smoothing top. Bake for 60 to 70 min or until a tester inserted in centre comes out with a few moist crumbs clinging to it. Let cool in pan on a rack for 15 min. Invert onto rack, remove pan and let cool completely.

Allow to cool. Store in an airtight container.  You can also freeze half or all of it, wrap in parchment paper, then place in a zippy bag. Defrost as normal and enjoy! It will still be moist.


IMG_4905 IMG_4906 IMG_4907 IMG_4908

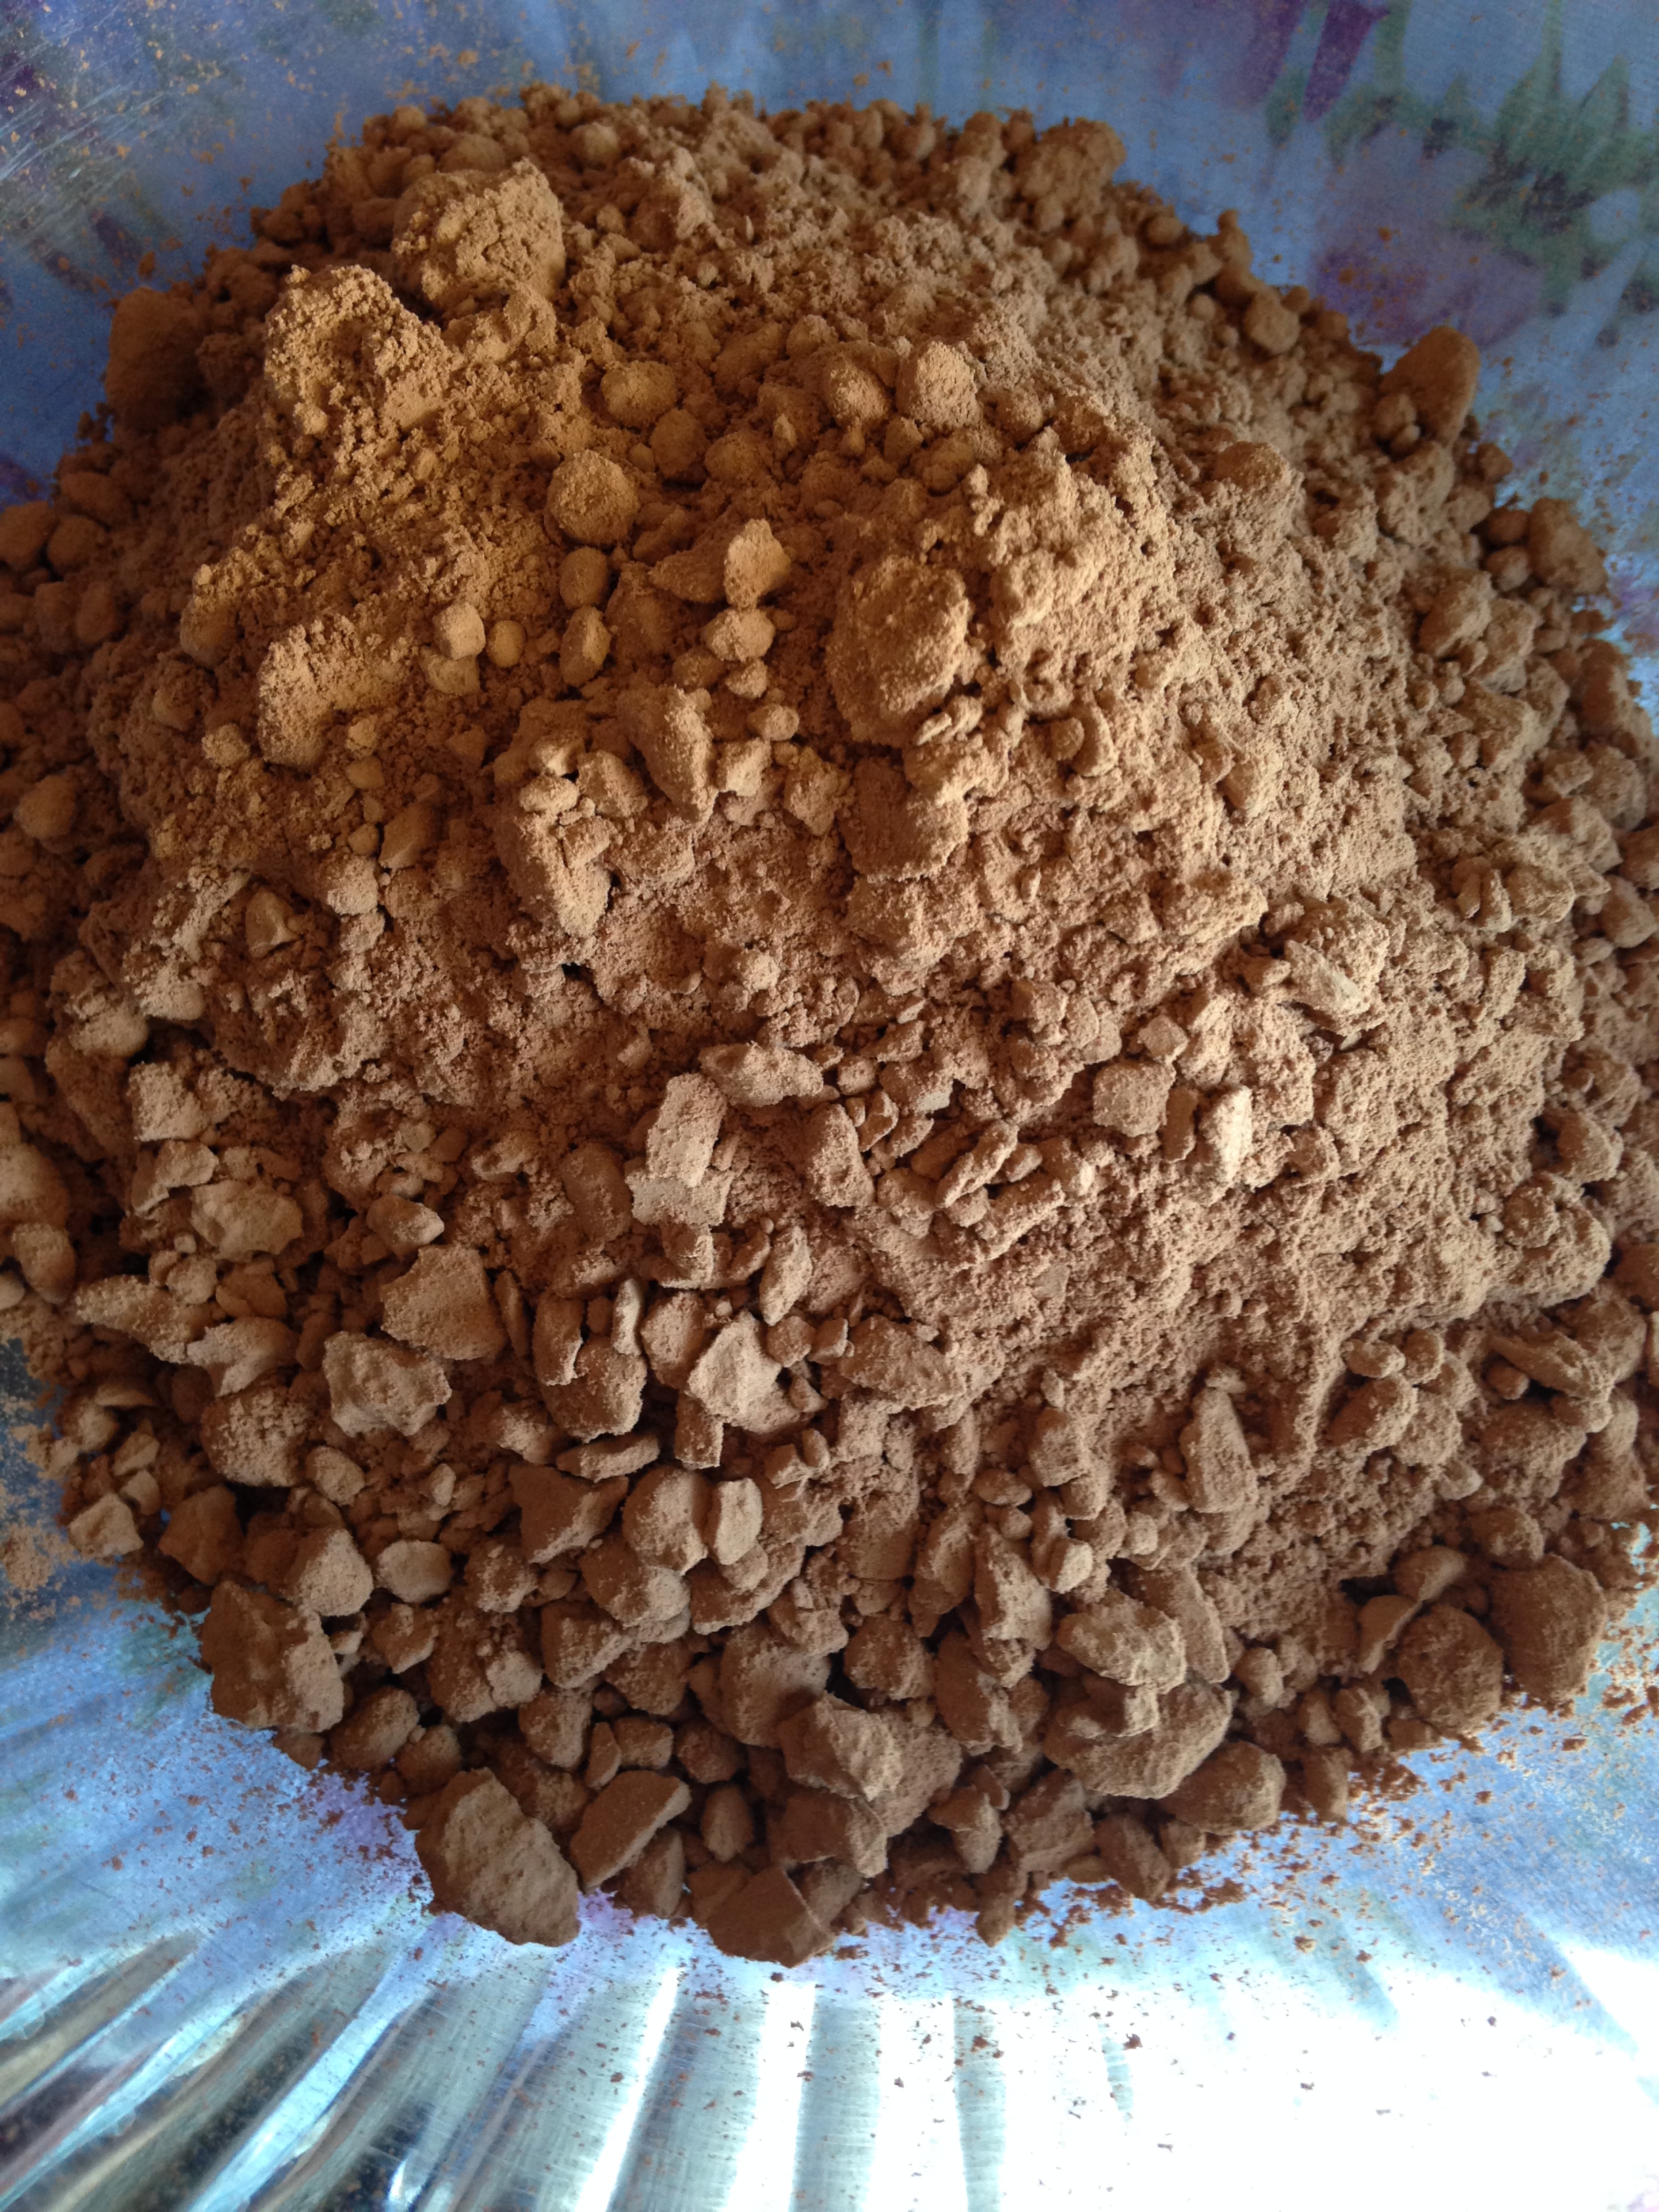
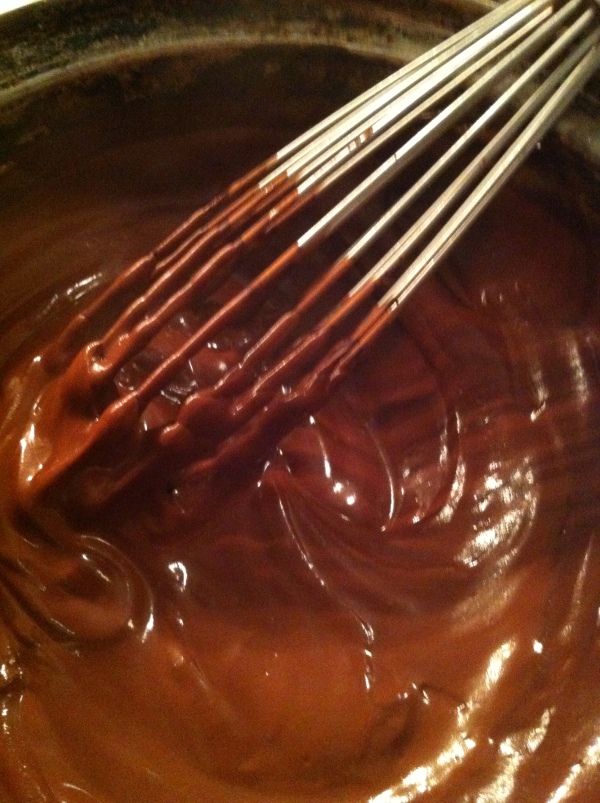
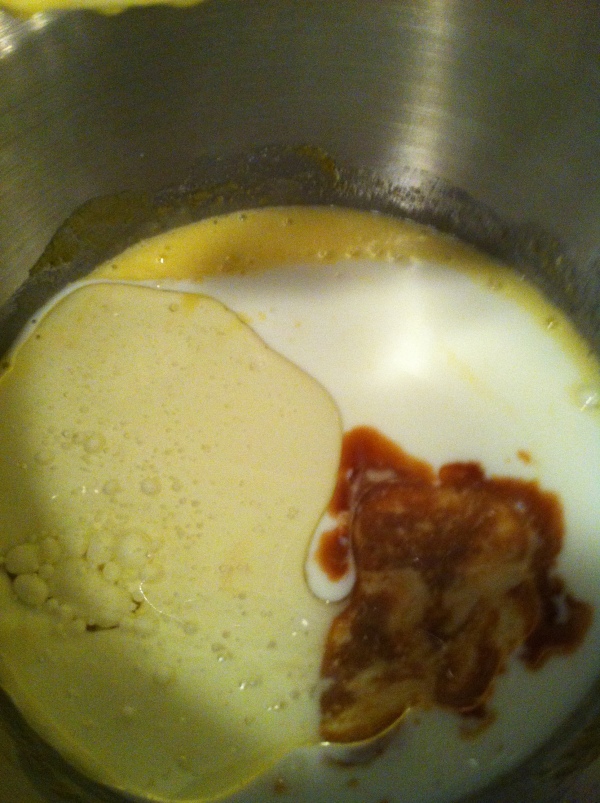
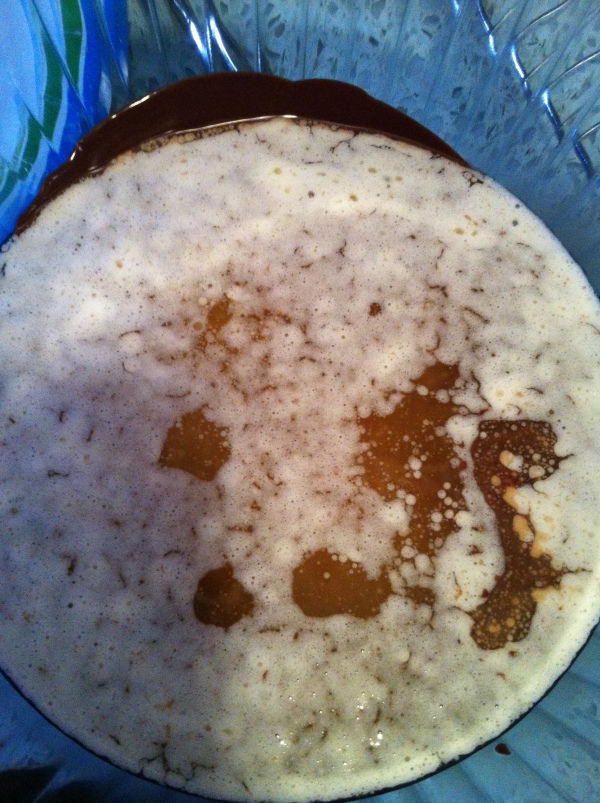
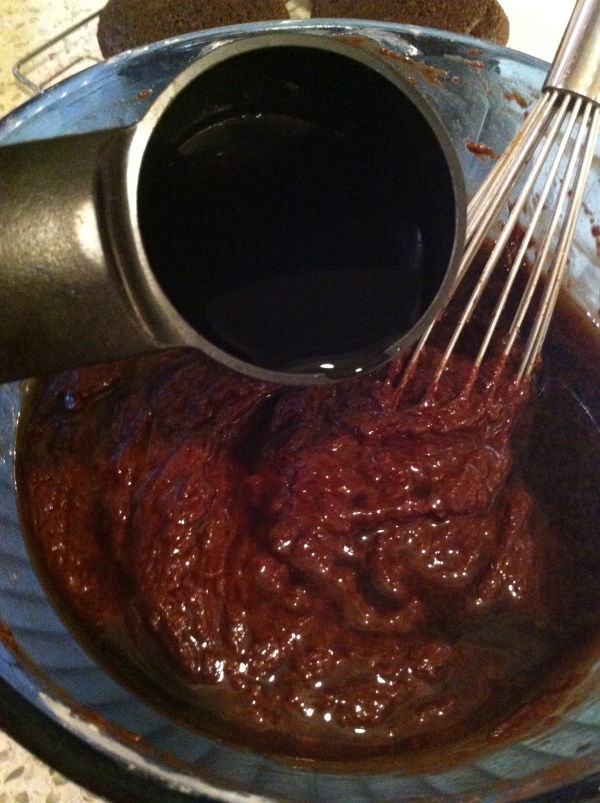
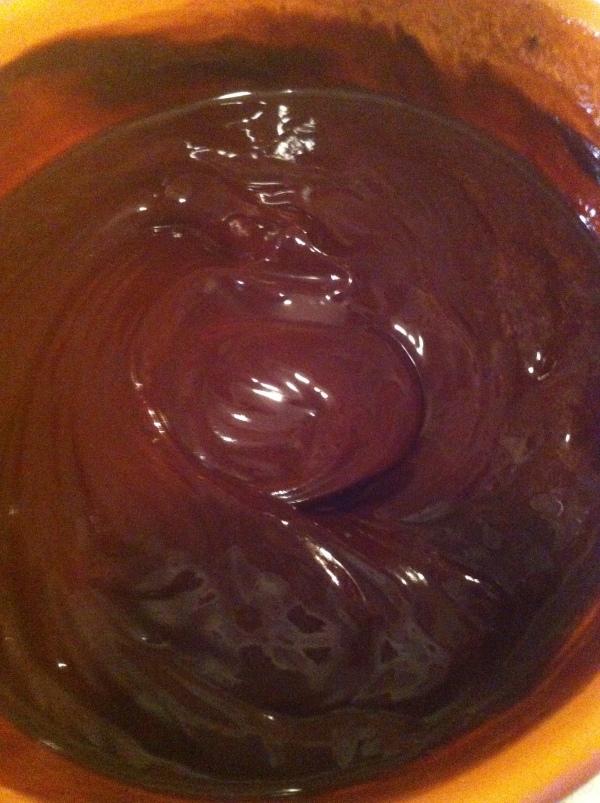
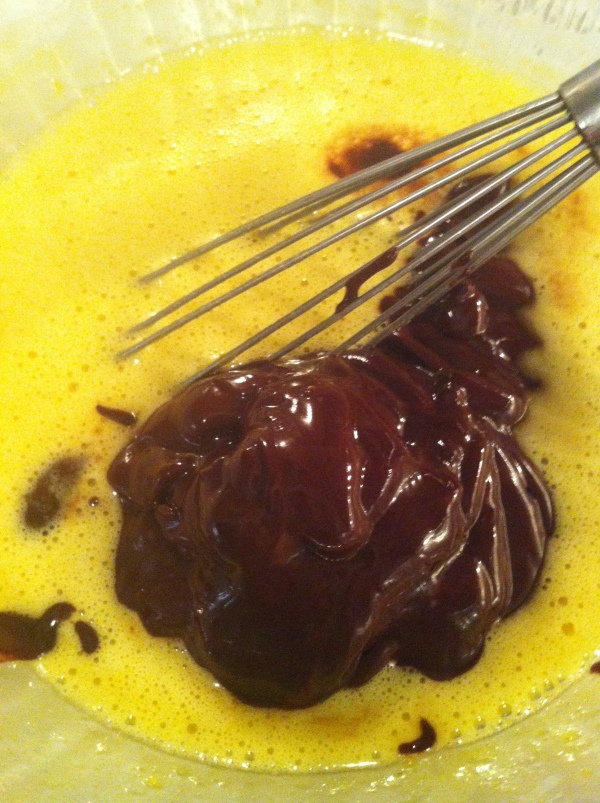
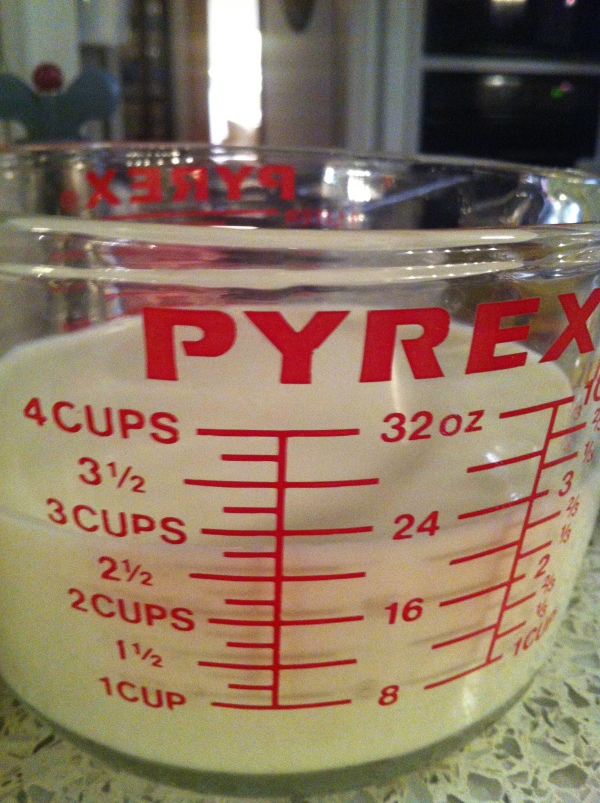
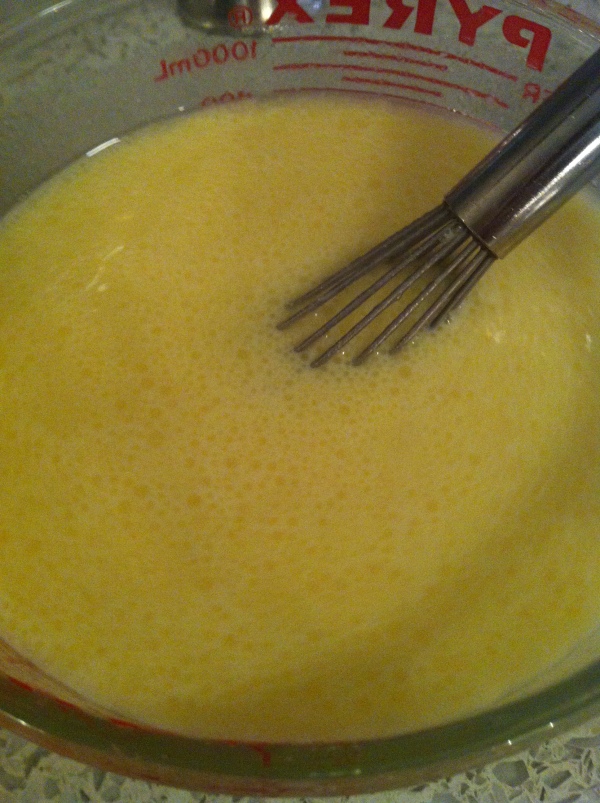
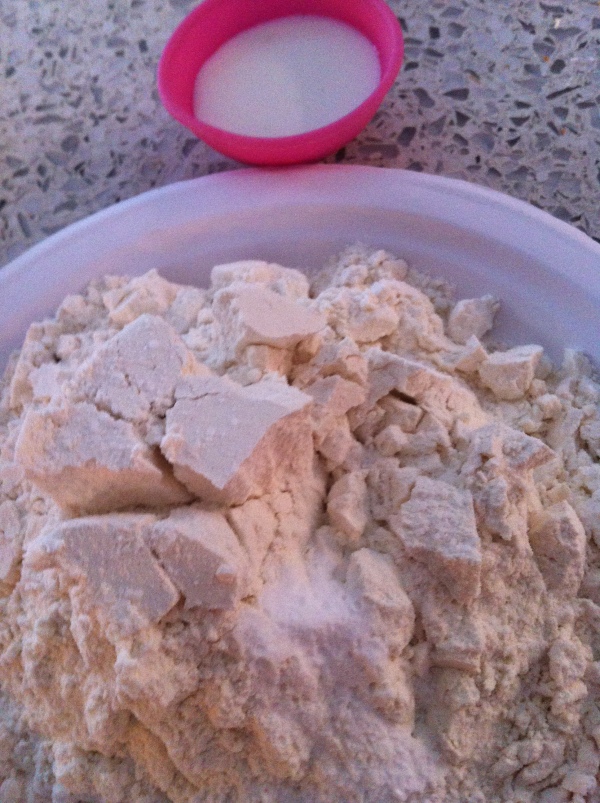
The first thing you want to do is whisk the milk into the cocoa powder. You want it to make a smooth paste.

IMG_4909 IMG_4910

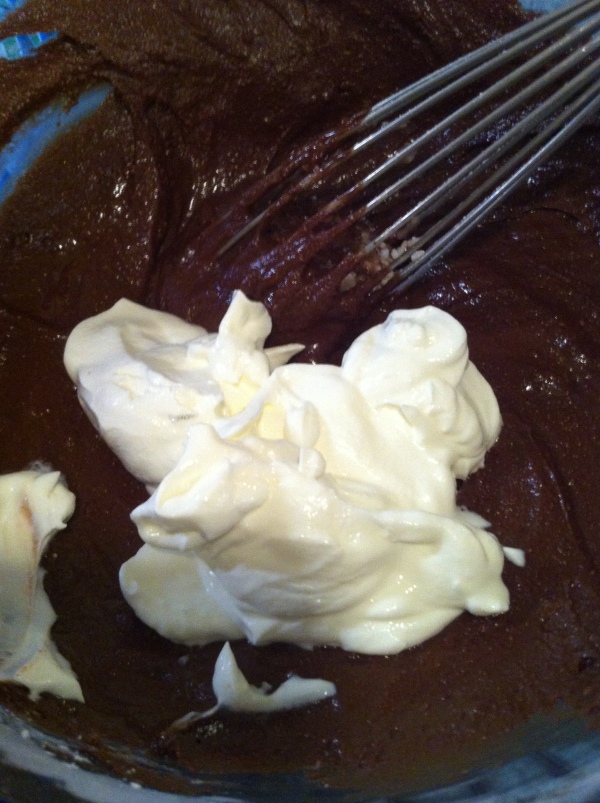
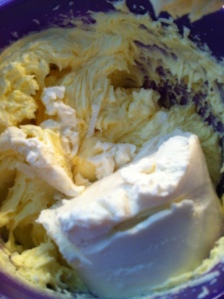
Next, whisk in the yogurt.

IMG_4911 IMG_4912

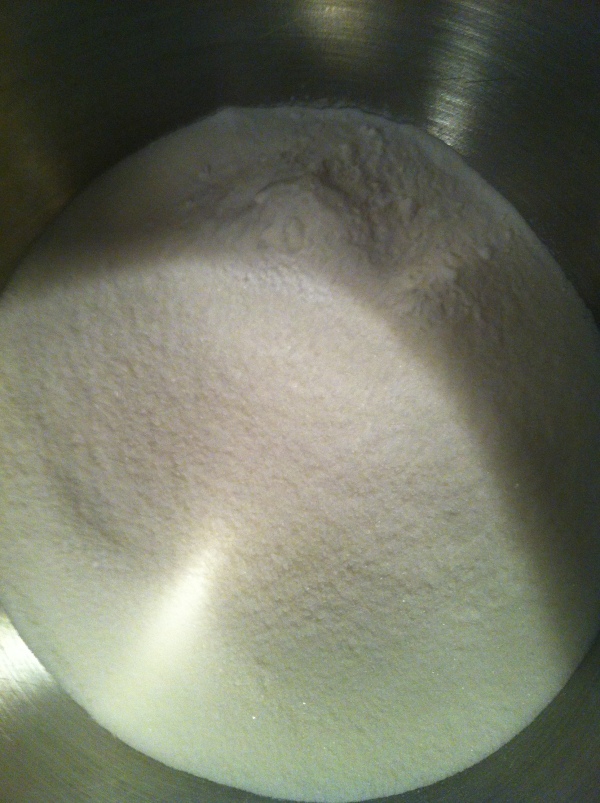
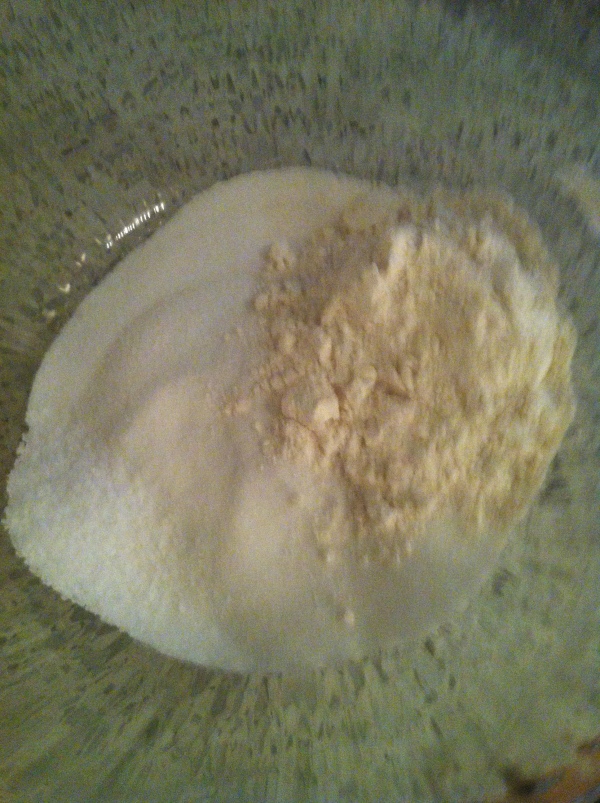
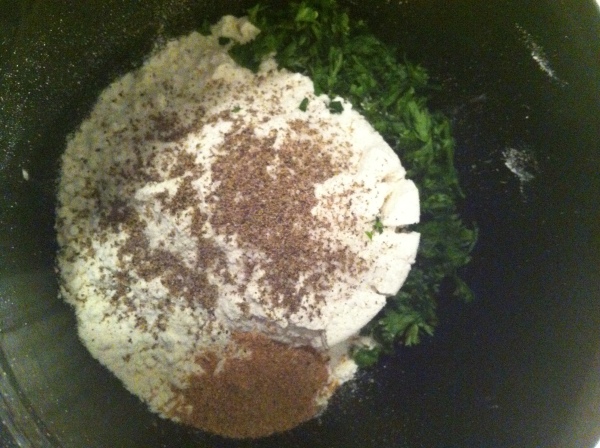
In another bowl combine your flour, baking powder, baking soda, and salt.

IMG_4913 IMG_4914

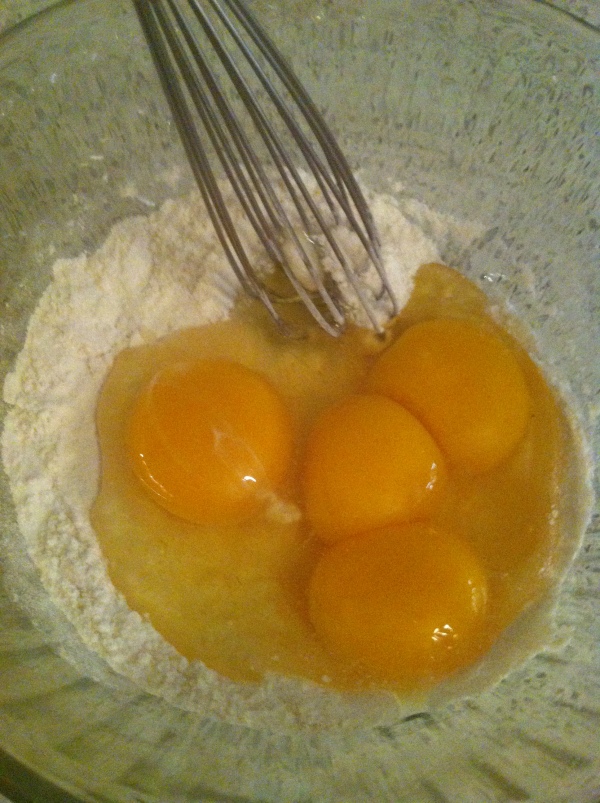
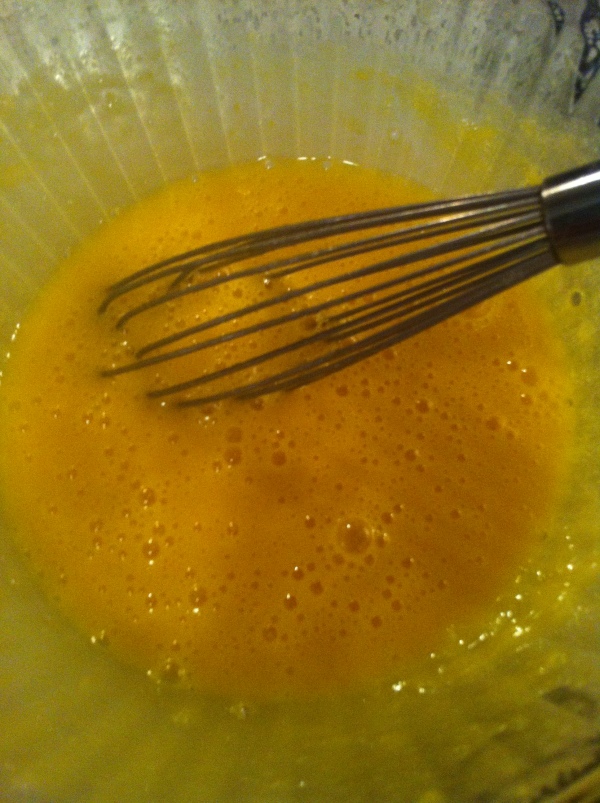
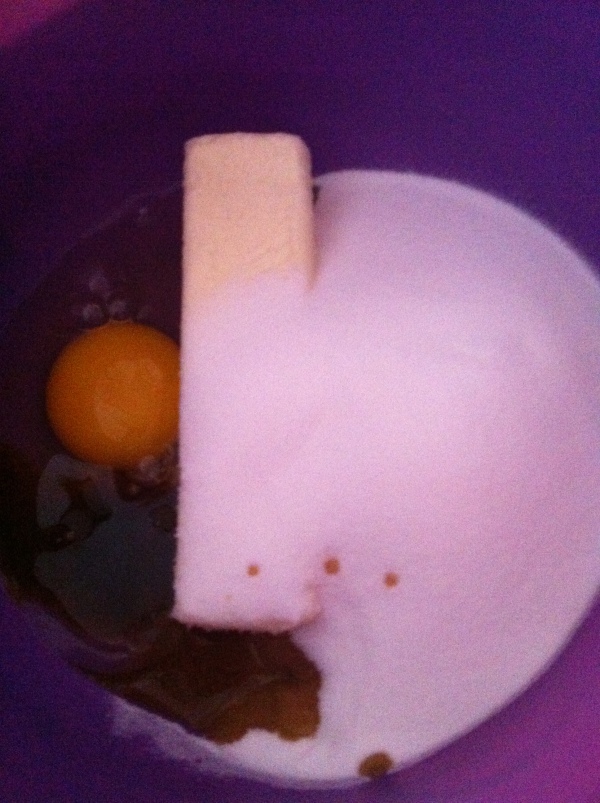
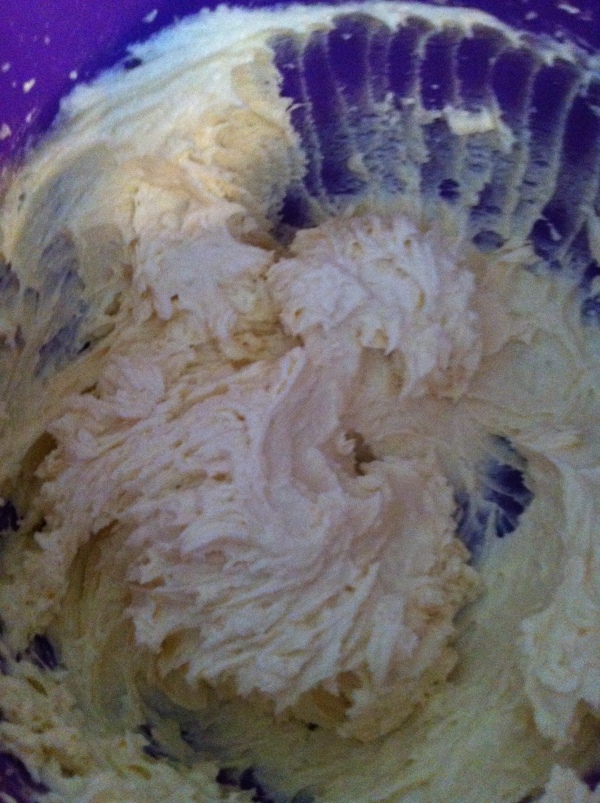
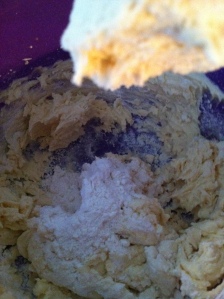
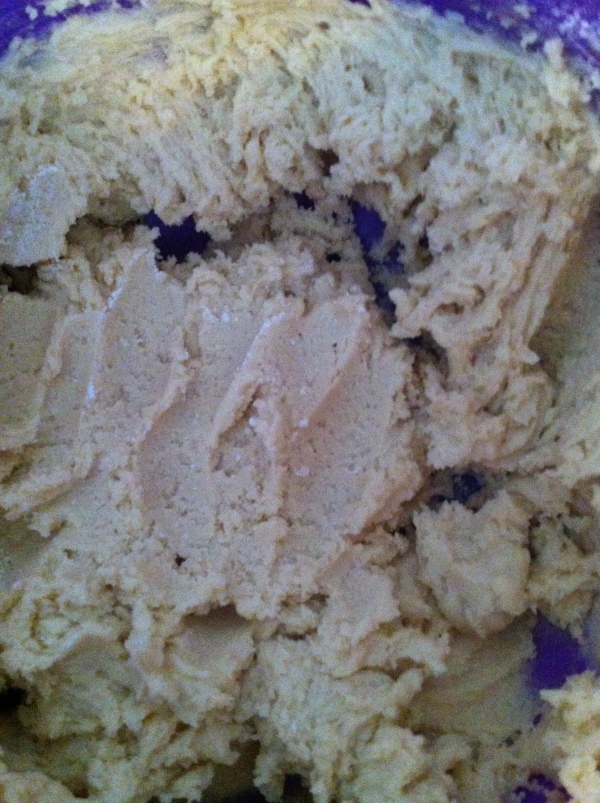
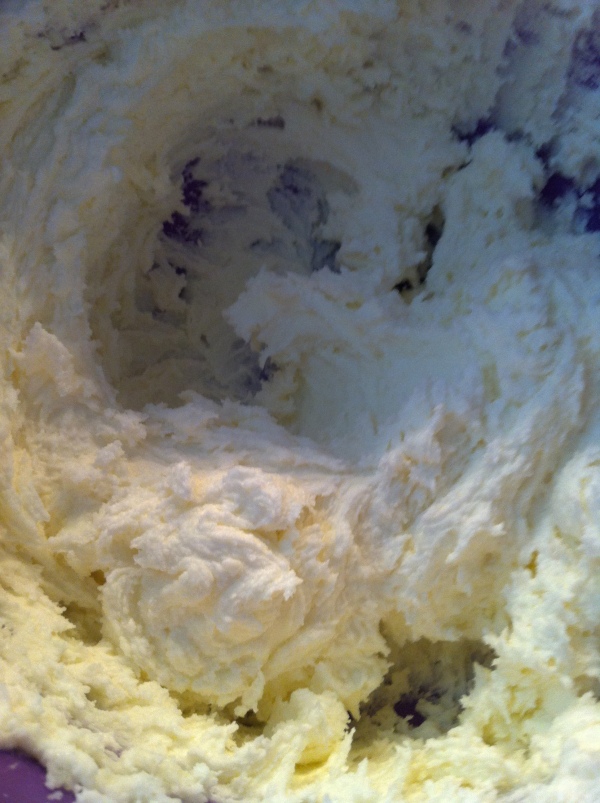
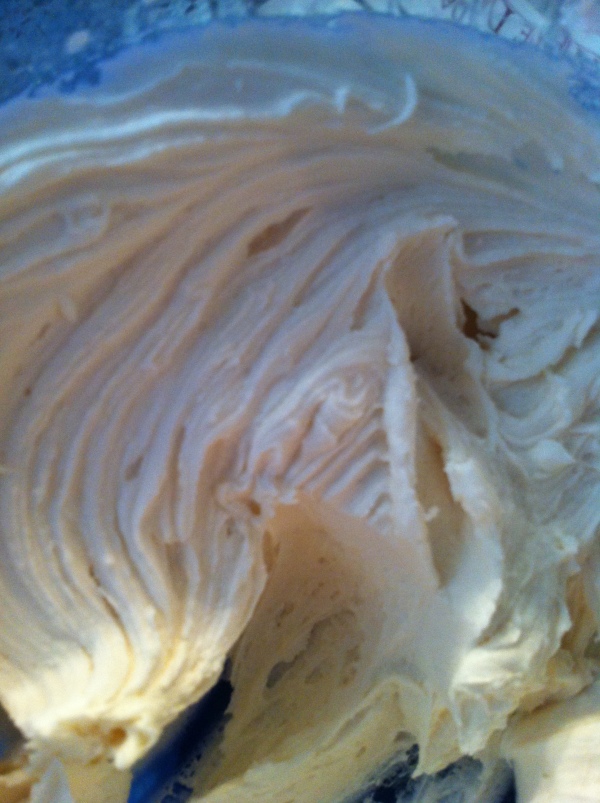
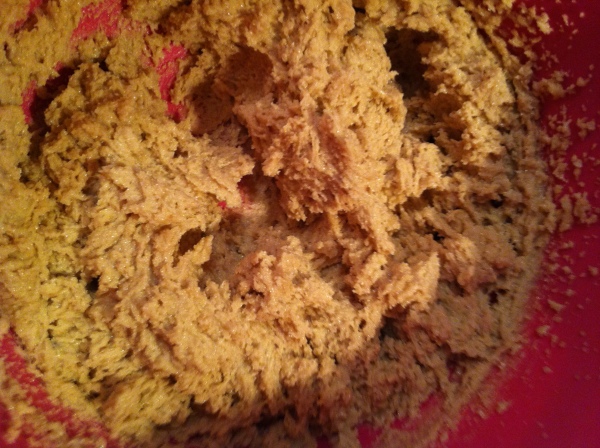
In a large mixing bowl mix your butter and sugar until light and fluffy.

IMG_4915 IMG_4916

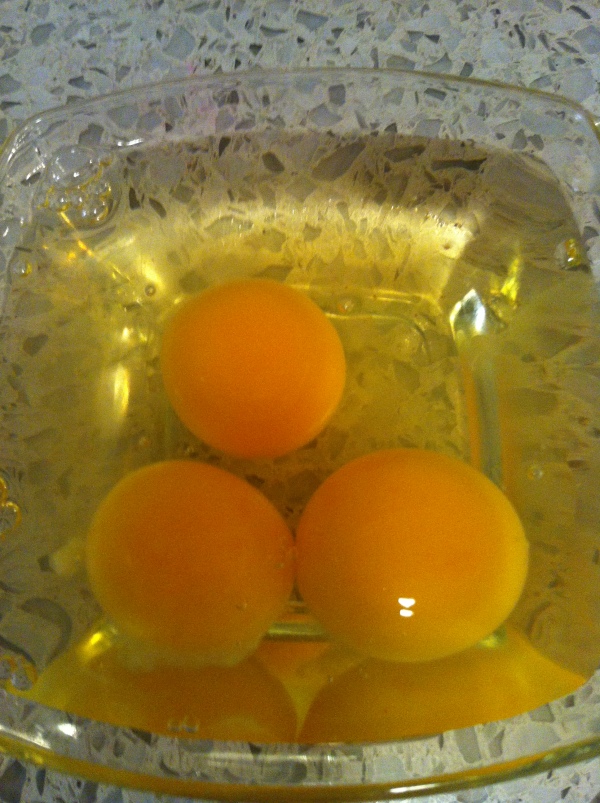
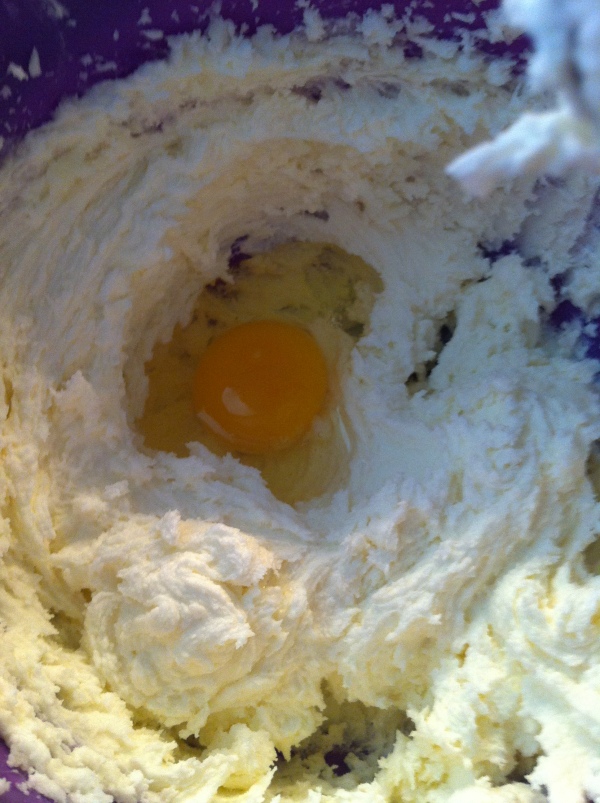
Beat in the eggs and vanilla.

IMG_4917 IMG_4918 IMG_4919

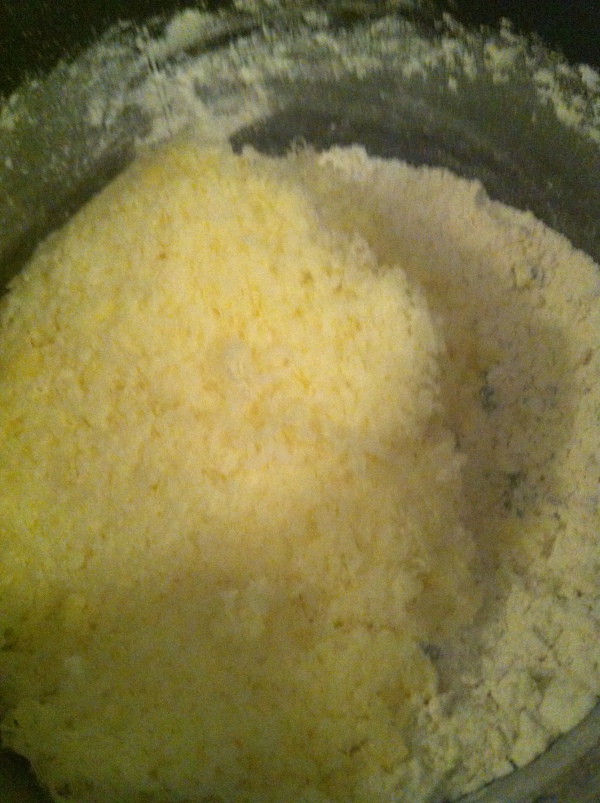
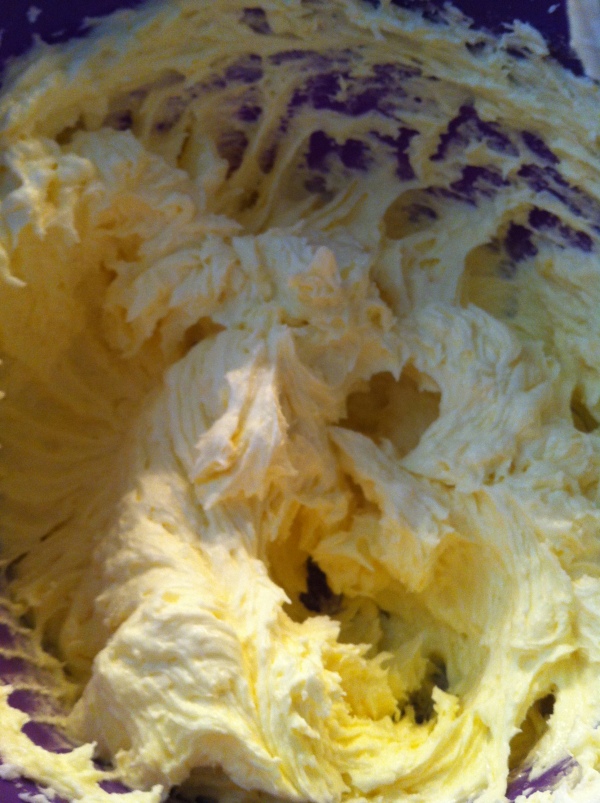
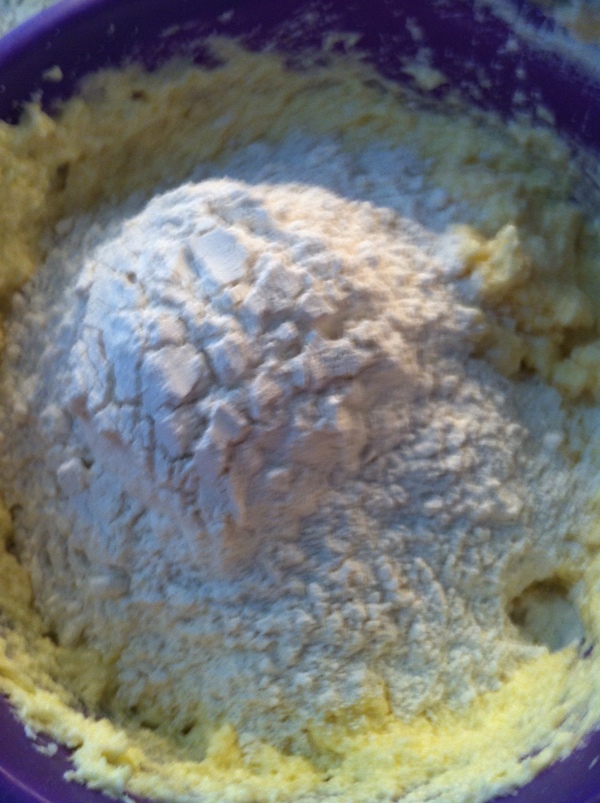
Add part of the flour mixture to the batter and stir it in with a wooden spoon.

IMG_4920 IMG_4921

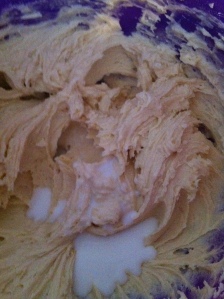
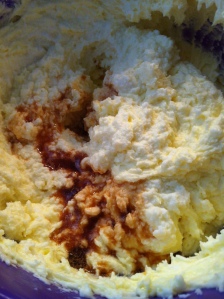
Stir in part of the chocolate and milk mixture.

IMG_4922 IMG_4923

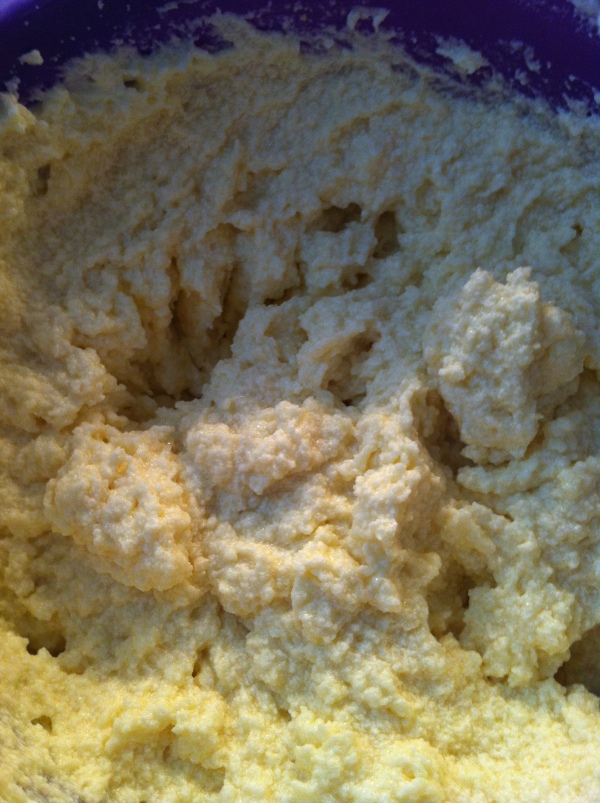
Stir in more of the flour mixture.

IMG_4924

IMG_4925

Stir in the rest of the chocolate and milk mixture.

IMG_4926

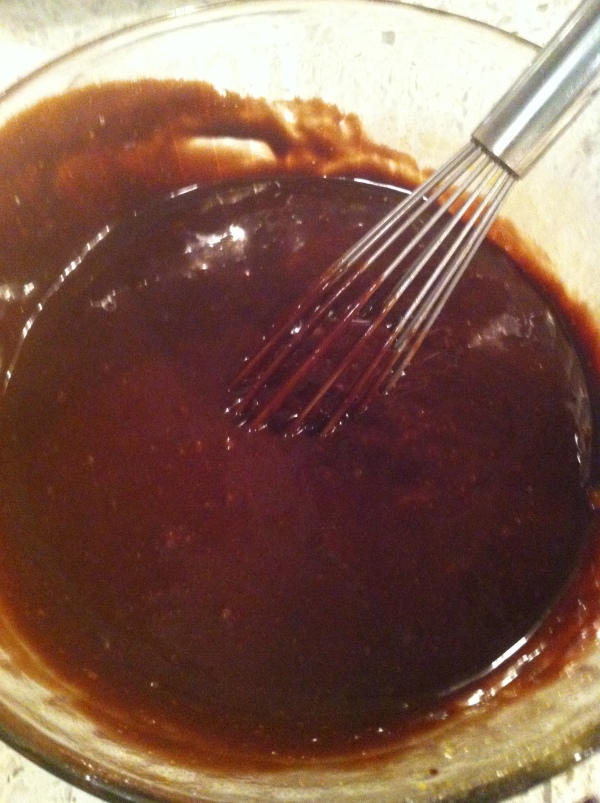
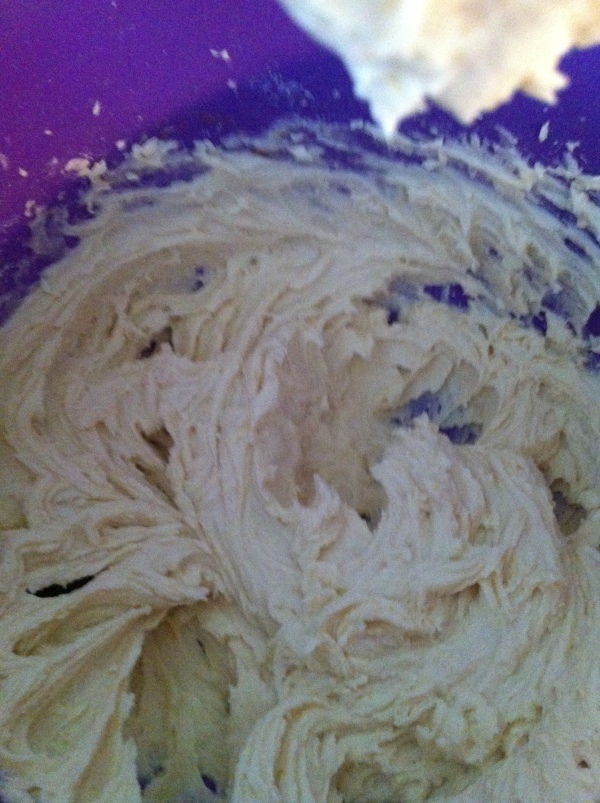
Stir in the rest of the flour mixture.

IMG_4927 IMG_4929

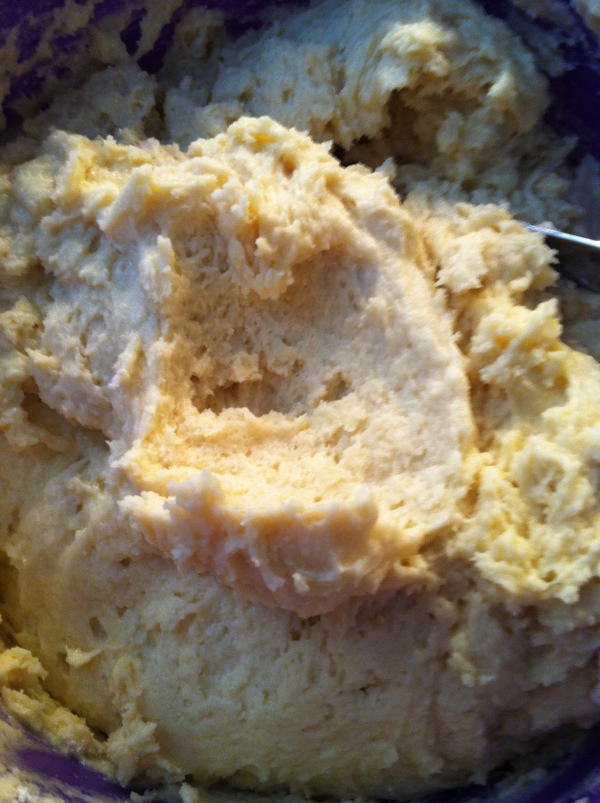
Fold in the chocolate chips.

IMG_4930 IMG_4931 IMG_4932

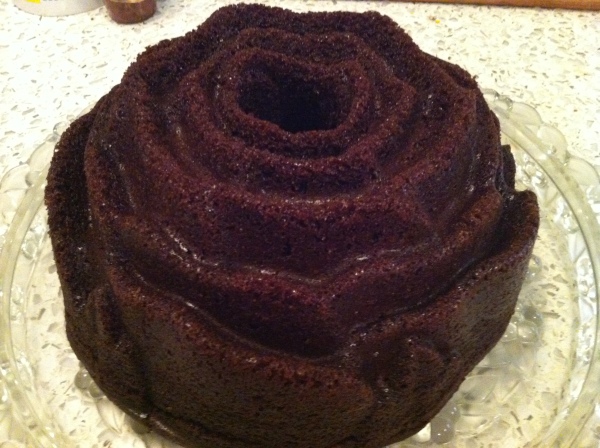
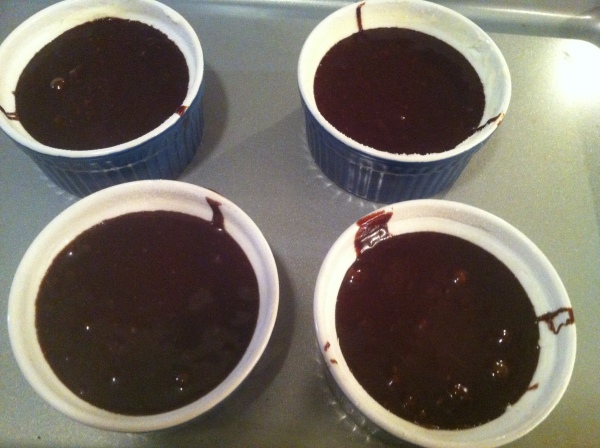
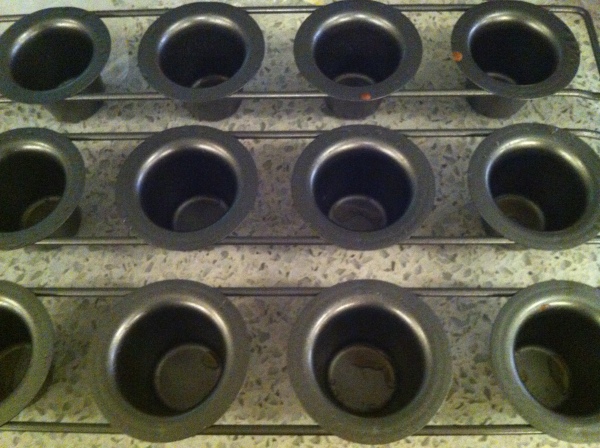
Pour into 2 greased loaf pans or a Bundt pan.

IMG_4933 IMG_4934 IMG_4935 IMG_4936

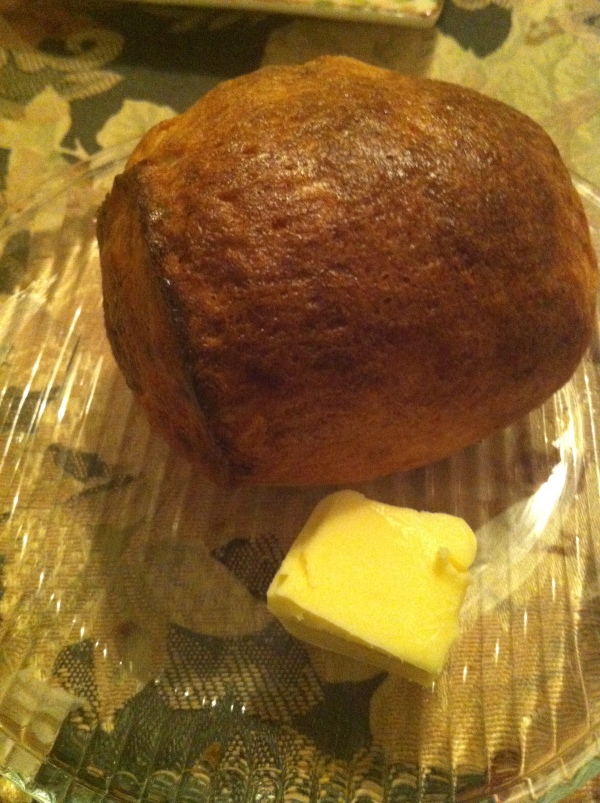
Bake in a 350-degree oven for about 1 hour or until done.  (Stick a toothpick in the center and when few moist crumbs stick to th toothpick they are ready).  Turn onto a wire rack to cool.

IMG_4943 IMG_4944

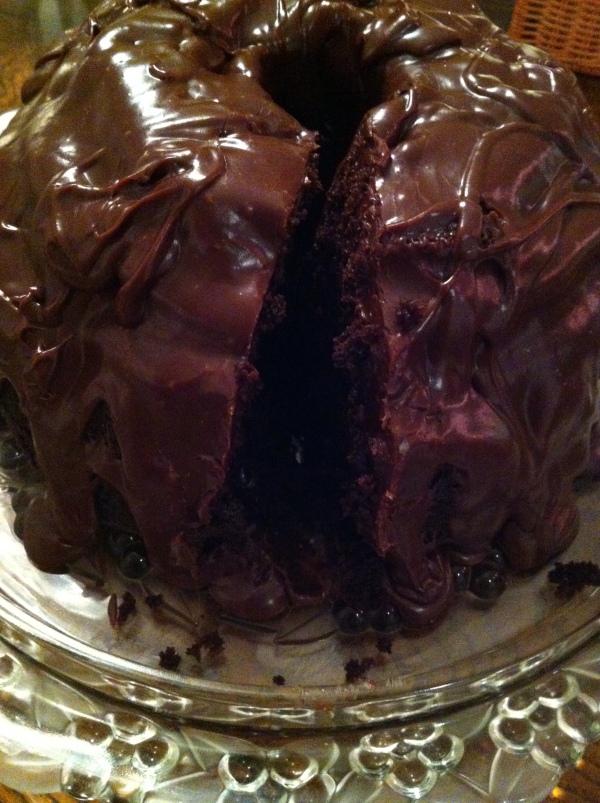
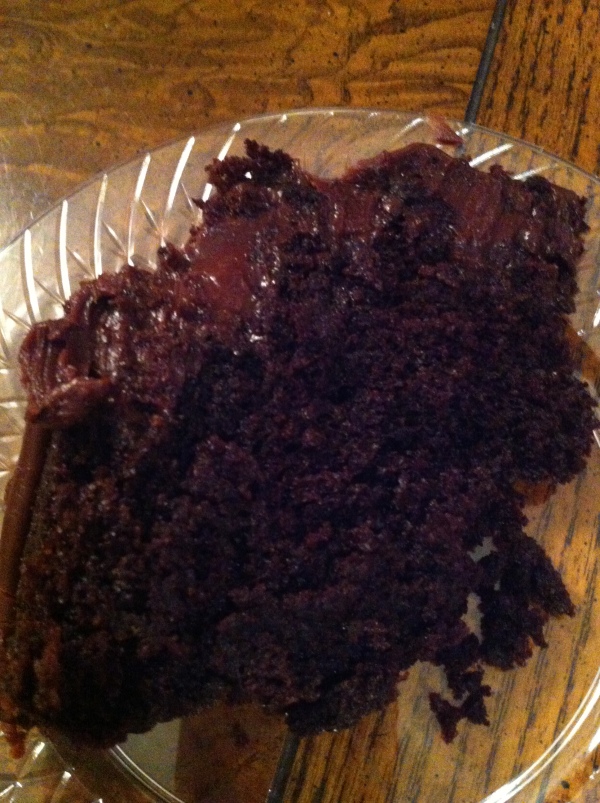
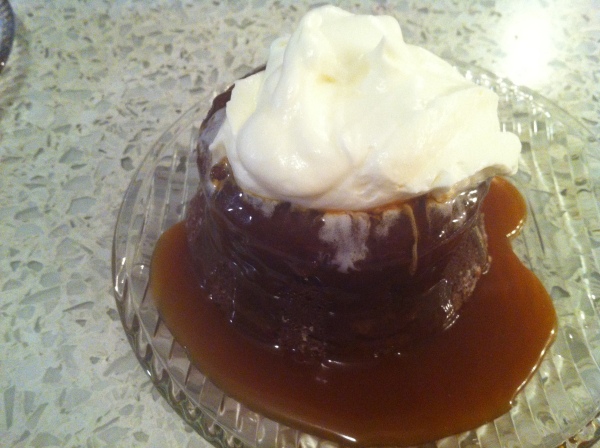
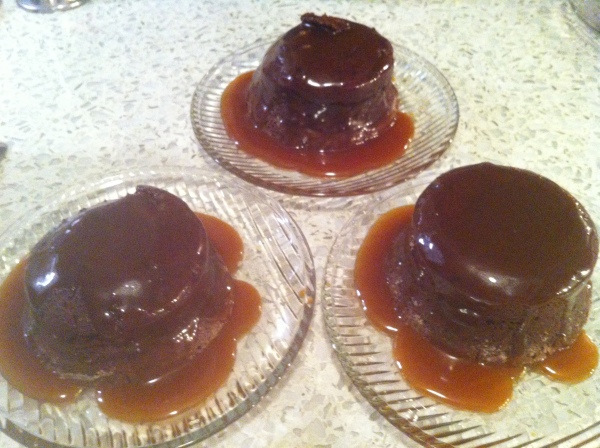
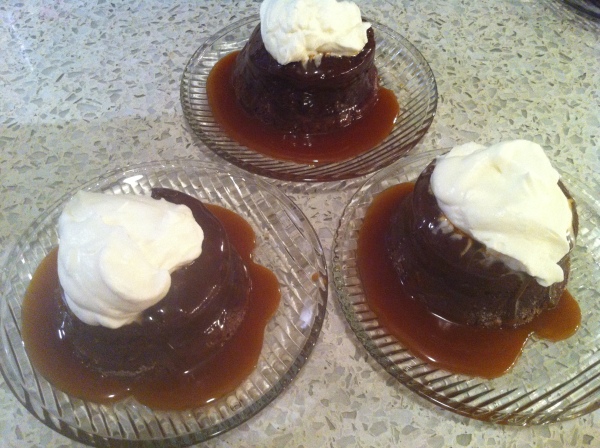
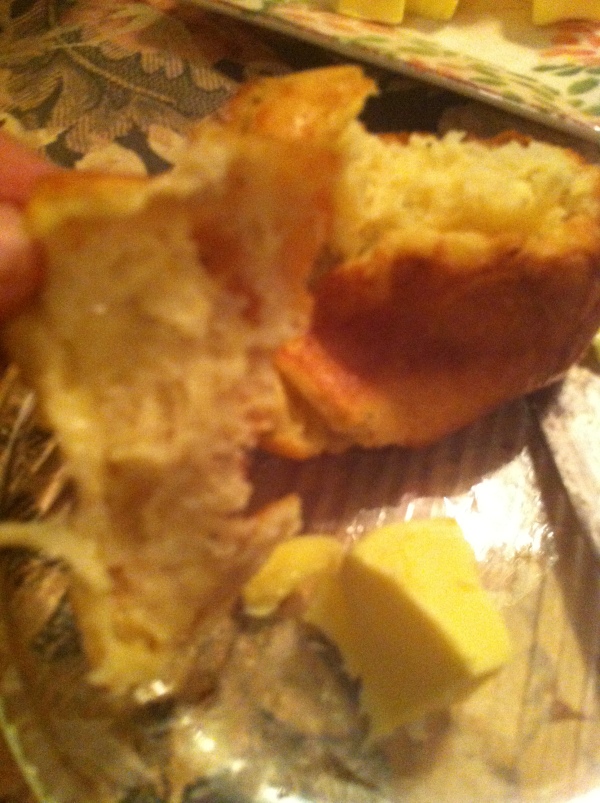
When they are cool cut and enjoy them!  I can promise you will not be disappointed. This is really good with a cold glass of milk or a cup of coffee!

I give this recipe  plus out of 4


Mom’s Sugar Cookies

Published July 18, 2014 by thepinkgourmet

Every now and then I just want a basic drop sugar cookie.  This recipe is just what I wanted.  This cookie is a crisp cookie and not too sweet.  They are very easy to make and this recipe makes a lot of cookies!  These would be good to make for a bake sale or for a potluck dinner!

103


Mom’s Sugar Cookies- source

Serving Size = About 30 cookies

  • 2 1/2 cups all purpose flour
  • 1 stick of butter (1/2 cup), softened
  • 1/2 cup of oil (canola, or vegetable, or grapeseed)
  • 1/2 cup of sugar
  • 1/2 cup powdered sugar
  • 1 egg
  • 1/2 teaspoon cream of tartar
  • 1/2 teaspoon of vanilla
  • 1/2 teaspoon baking soda
  • 1/4 teaspoon salt
  • Extra sugar for smashing and decorating
  1. Preheat oven to 350F. Lightly grease baking sheet.
  2. In a bowl mix together the flour, cream of tartar, baking soda and salt. Set aside.
  3. In a mixer, mix together the butter and sugar until creamed together then add the egg. Add the powdered sugar, oil and vanilla, mix.
  4. Add the flour mixture to the butter mixture until just combined.
  5. Pour some sugar onto a small plate and then take a large drinking glass (about a 3-inch wide bottom) and dip the bottom of the glass into the cookie dough just to moisten it. Place the glass, bottom side down, onto the sugar covered plate.
  6. With the dough, form 1-inch balls and place a few inches apart on the baking sheet. Take the sugar covered glass and smash each cookie until it spreads out to the size of the glass. Dip the glass in sugar again and repeat with each cookie, remembering to dip the glass into the sugar after smashing each cookie.
  7. Bake for 12 minutes, or until the edges of the cookies just start to get a touch of light brown color on them. Remove from oven and sprinkle lightly with sugar, just for decoration. Remove immediately to a cooling rack.
Note: These freeze well.
079
The first thing you need to do is mix your flour, cream of tartar, baking soda, and salt. Set aside.
080
Put your butter and sugar in a large bowl. I did not read the recipe right and added both the granulated sugar and most of the powdered sugar.  It only called for the granulated sugar with the butter but it did not make a difference. It mixed up fine.
082
You want to cream the butter and sugar well.
084
085
086
 Mix the egg till well incorporated.
087
088
089
Add the powdered sugar(I added the rest here), the vanilla and the oil and mix well.
090
091
092
Add the flour mixture to the butter mixture and mix just till combined.
093
Form the dough into 1 inch balls and place on a cookie sheet.  I lined mine with parchment paper.
094
095
096
097
098
Dip the bottom of a glass in the cookie dough and then dip the glass in some granulated sugar on a plate.  Take the glass and then smash the cookie till it spreads to the size of the bottom of the glass.
100
Bake in a preheated 350 degree oven for about 12 minutes or until the edges start to brown.
101
102
Sprinkle with additional sugar and immediately take off of cookie sheet to cooling rack .  I bet you will not even wait for them to cool before you eat one!  They are truly delicious!
I give this recipe  plus out of 4

Condensed Milk Pound Cake

Published July 14, 2014 by thepinkgourmet

If you are looking for an easy to make Pound Cake you should try this one!  This Pound Cake is not as big as a regular recipe.  It is  made in a loaf pan.  The cake is really moist!

030

Condensed Milk Pound Cake – source

Condensed Milk Pound Cake
Yields 1 8-1/2 x 4-1/2 inch loaf pan

Ingredients:
1 1/3 cups all-purpose flour
3/4 teaspoon baking powder
1/2 cup sugar
2 vanilla bean, chopped or 1 tablespoon vanilla extract
1 cup or 2 sticks of unsalted butter, room temperature
1/2 teaspoon salt
3/4 cup sweetened condensed milk
3 large eggs
Condensed milk, for garnish
Chocolate syrup, for garnish

Method:
Preheat the oven to 350 degrees F. Butter the loaf pan completely and set aside.

Sift the flour and baking powder together and set aside.

PUt the sugar and the chopped vanilla bean (if you’re using it) in the bowl of a food processor fitted with the metal blade. Pulse until the vanilla bean is finely ground. Strain the vanilla sugar through a fine-mesh sieve and return to the food processor. If you’re not using a vanilla bean, place the sugar in the food processor.

Add the butter and salt to the food processor and process until the butter and vanilla sugar are light and fluffy, about 2 minutes. Scrape the sides and bottom of the bowl and then add the condensed milk and pulse until well incorporated, about 15 times. Scrape the sides and bottom of the bowl again and then add the flour and pulse until it is incorporated, about 10 times. Add the eggs and pulse just until combined, about 4-5 times. If you’re using vanilla extract, add it now. Mix by hand using a spatula to make sure the batter is fully mixed.

Pour the batter into the prepared loaf pan. Bake until a tester inserted in the center comes out clean, about 55-60 minutes. I baked mine for exactly 1 hour and I found it a tad over baked. Other bloggers who’ve made this cake have reported baking times from 60 to 80 minutes. Next time, I would test for doneness at the 50-minute mark. Cool cake completely in the pan.

To serve, drizzle more condensed milk and chocolate syrup on the cake slice.

Adapted from The Sweet Spot: Asian-Inspired Desserts by Pichet Ong and Genevieve Ko

© Daisy’s WorldAll rights reserved. Unauthorized use and/or duplication of this material without express and written permission from this blog’s author and/or owner is strictly prohibited. Excerpts and links may be used, provided that full and clear credit is given to Daisy’s World with appropriate and specific direction to the original content.


016

017

The first thing you need to do is sift your flour and baking powder and set aside.

019

I did not use a vanilla bean so the next thing I did was put my butter, vanilla, sugar and salt into a bowl. I did not use a food processor just a hand mixer.

020

Mix until light and fluffy.

021

022

Add the condensed milk and beat until smooth.

023

024

Add the flour and mix until well incorporated.

025

026

Next add the eggs and mix until well combined.

027


028

029

Pour into a buttered loaf pan. Bake at 350 degrees for about 50 minutes or a toothpick comes out clean in the middle.  Do not over bake it. I let my stay in the pan for about 10 minutes and then turned it out onto a cooling rack.

031

You can eat it plain but it is wonderful drizzled with chocolate syrup and more condensed milk! Be ready for nice treat!  It is even good for breakfast warmed in the oven with a little butter.

I give this recipe  plus out of 4…


Salted Caramel Filled Molten Chocolate Cakes

Published June 23, 2014 by thepinkgourmet

If you are looking for a wonderful dessert to end a meal, this is what you should make!  It is rich and very decadent!  It is really easy to make and can be made ahead to save time.  It is actually a lot lighter than it looks!   It practically melts in your mouth!


322


Salted Caramel Filled Molten Chocolate Cakes

source

For the Salted Caramel:
1/3 cup (65 g) granulated sugar
1 tbsp agave syrup, honey or corn syrup
1/4 cup (60 ml) water
1/3 cup (80 ml) heavy cream
1/2 tsp flaky salt
1 tsp vanilla extract
(alternatively, you can skip making the caramel: Take 6 store-bought salted caramels and poke one into the batter in each ramekin after chilling)
For the Cakes:
3.5 oz (100 g) chopped bittersweet chocolate (70% cocoa solids)
1/4 cup (55 g) unsalted butter
3 tbsp (30 g) all purpose flour
1/4 tsp salt
3 eggs
1/3 cup (65 g) granulated sugar
2 tbsp softened butter and 2 tbsp cocoa powder, for the ramekins
optional: whipped cream or vanilla ice cream, to serve

In a deep saucepan, heat the first three caramel ingredients, stirring just until the sugar dissolves. Continue to cook over a medium-high heat, swirling the pan often (don’t use the spoon to stir the mixture as this can cause crystallisation in the caramel) until the mixture becomes golden. Remove from the heat and immediately add the cream then stand back for a second as the mixture will bubble up. Stir in the cream until completely combined, then stir in the salt and vanilla extract. Set the caramel aside to cool.

Butter six, 4-oz ramekins and dust with the cocoa powder, shaking out any excess.

In a small saucepan, heat the chocolate and butter together on low, stirring until just melted. Remove from the heat and stir in the flour and salt until smooth.

Crack the eggs into a large bowl and beat using an electric whisk whilst gradually adding the sugar until pale. Pour the chocolate mixture into the egg mixture and gently fold together using a rubber spatula. Divide the mixture between the ramekins and chill for at least 30 minutes (or up to 5 hours, if making in advance).

Ten minutes before you’re ready to bake the cakes, preheat your oven to 350 F.

Spoon a heaped teaspoon of the cooled caramel into the centre of each ramekin and slightly push it down into the cake mixture. Place the ramekins onto a small baking tray and bake for 8-10 minutes. Loosen the edges of the cakes with a knife and turn out onto individual plates. Serve immediately with whipped cream or vanilla ice cream.

 The first thing you need to do is make your caramel!

289

290


291291

292


Heat the granulated sugar, honey, agave syrup, or corn syrup, and the water in a deep saucepan, stirring until the sugar dissolves.

293

294

295

Swirl the pan over medium-high heat until the mixture becomes golden.  Do not stir.

296

297

Remove from the heat and add the cream immediately.  It may bubble up when you first add it.  Stir until the cream is completely combined.

298

300

Next stir in the vanilla and salt.  Set aside to cool.

301

302

307

Melt the chocolate and butter over low heat just until melted.

308

309

Remove from heat and add the flour and salt. Stir until smooth.

303

304

305

306

In a large bowl whisk or beat the eggs adding the sugar little by little till they become pale in color.

310

311

314

Fold in the chocolate mixture into the eggs using a rubber spatula.

313315

Pour into 6 buttered and cocoa dusted ramekins. Chill for  at least 30 minutes and up to 5 hours.

316

317

318

Place ramekins on a baking sheet. Pour a heaping teaspoon of caramel into the middle of each ramekin.  Slightly push it down into the center.  Bake at 350 degrees for about 10-12 minutes.

320

Remove from the oven and run a knife around the edges of the ramekin. Invert onto individual serving plates.

323

321

325

Serve immediately with whipped cream or ice cream! I am sure you will enjoy them.  They also heat up well the next day in the microwave on about power 30 for about 90 seconds!

I give this recipe  plus out of 4…


Best Darn Ham Sandwiches Ever

Published July 23, 2013 by thepinkgourmet

These are truly amazing little sandwiches.  They are easy to make and have a great flavor.  What makes these different is the glaze you brush over the sandwiches.  These would be great for a sports party as an appetizer or at  a kids party as the main course. I had them for my dinner with a salad and some fruit. I think instead of ham you could use Turkey, wheat rolls, and any kind of cheese you like.

012

Best Darn Ham Sandwiches Ever

Source

Cook Time

Prep time: 1 hour 20 min
Cook time: 15 min
Ready in: 1 hour 35 min
Yields: 12

Ingredients

  1. You will need two 9 x 13 pans. Place the bottoms of 12 rolls in each pan. Place ham (about 2 shaved slices or so) on the rolls. Cut the cheese slices into 4 parts and place 2 small pieces on each sandwich. Put the dinner roll tops on.
  2. In a sauce pan, mix butter, Worcestershire sauce, onion powder, garlic powder and poppy seeds. Wait until all butter is melted and then brush the melted mixture over the ham sandwiches
  3. Cover with foil and let sit in fridge for 1 hour or over night. (If you want to bake them right away, you can also.) Preheat oven to 375 and bake for 15 minutes or until cheese is melted. Serve.

002

003

The first step I did was make the glaze that you brush over the sandwiches.  I did not use poppy seeds. Mix butter, Worcestershire sauce, onion powder, and  garlic powder together in a small saucepan till the butter melts.  I did this in the microwave.

005

006

007

008

Next put your sandwiches together.  I did use the Sweet Hawaiian Rolls. I spread a little bit of butter on mine first.  I also used honey ham which is what I like.  Add your ham and cheese. You can see I was very generous with my ham and cheese.

009

Brush the glaze over the sandwiches.  Here comes the important part.  Cover with foil and put into the refrigerator for 1 hour or overnight.

058

Bake in a 375 degree oven for about 15 minutes or until the cheese melts.  I baked mine with the foil on top for about 10 minutes and then uncovered them the rest of the cooking time.   I can tell you that you will Love these!!!!

I give this recipe plus out of 4……

New York-Style Coffee Cake Crumb Muffins

Published June 18, 2013 by thepinkgourmet

This is a recipe I made for breakfast for my father on his Birthday!  It has a very fine texture with a big flavor! The crumb topping goes well with the muffin.  It is not a hard recipe to make and can be made within a little over an hour from start to finish.  I will for sure make this recipe again.

019

New York-Style Coffee Cake Crumb Muffins

Source

Ingredients:

For the crumb topping:

1/3 cup granulated sugar

1/3 cup dark brown sugar

3/4 tsp. ground cinnamon

1/8 tsp. salt

8 tbsp. unsalted butter, melted

1 3/4 cups cake flour

For the muffin:

1 1/4 cup cake flour

1/2 cup granulated sugar

1/4 tsp. baking soda

1/4 tsp. salt

6 tbsp. unsalted butter, cut into 6 pieces, softened but still cool

1 large egg

1 egg yolk

1 tsp. vanilla extract

1/3 cup buttermilk (or 1/3 cup plain yogurt)

Instructions:

  1. Preheat oven to 325 degrees. Line muffin pan with baking cups or prepare panettone baking cups by spraying them lightly with cooking spray.
  2. In a medium bowl, whisk together sugars, cinnamon, and salt. Pour the butter over top and using a wooden spoon, mix until incorporated. Then add the cake flour and mix until mixture resembles a thick and cohesive dough. Set aside.
  3. In the bowl of a stand mixer fitted with the paddle attachment,�mix flour, sugar, baking soda, and salt on low speed to combine. With mixer at low speed, add butter one piece at a time; continue beating until mixture resembles moist crumbs, with no visible butter chunks remaining, 1 to 2 minutes.
  4. Add the egg, egg yolk, vanilla extract and buttermilk and mix until all has been incorporated and batter is light and fluffy.
  5. Using a 1/4 cup measuring cup, divide up batter into prepared muffin pan. Then, sprinkle a generous amount of the crumb topping on top. Do not press the crumb topping into the batter. Just let it sit on top.
  6. Bake for 20 minutes or until crumbs are golden and a toothpick inserted into the middle comes out clean. (Note: I did stick my muffins under the broiler at about �the 15 minute baking mark so the tops would get nice and brown. If you do this, make sure to watch it carefully. You do not have to do the broiler step and can omit it completely.)
  7. Let muffins cool for 5 minutes before transferring them to a wire rack to cool completely.
  8. Store in an airtight container for up to 2 days.

002

003

The first thing you need to do is make the crumb topping.  Whisk the sugars, the cinnamon and salt together in a medium bowl.

005

006

Next add your melted butter to the sugar mixture. Mix until well incorporated.

007

008

Add the cake flour and mix until it becomes a thick dough.

009

011

012

Now it’s time to make the muffin.  Mix the flour, sugar, baking soda and salt in deep bowl on low-speed. Next add butter one piece at a time and mix until it resembles moist crumbs.

013

014

Add your egg, egg yolk, buttermilk and vanilla and mix until you have a light and fluffy batter.

015

Put 1/4 cup of batter into each baking cup.

016

Sprinkle the crumb topping over the top of each muffin.  Use it all.

017

018

Bake for 20 minutes in a 325 degree oven.  You can turn the broiler on at the 15 minute mark and finish the muffins so they get brown on the top.  Just be sure to watch them closely if you do this.  (You do not have to do this, you can leave them at 325 degrees till they are done and a toothpick inserted comes out clean)  Let them cool before eating them.  I can promise you will be very happy with them!

I give this recipe plus out of 4……

Cake Batter Fudge – 10 Minute Recipe!

Published March 1, 2013 by thepinkgourmet

This is one of the easiest and most delicious fudge recipes I have made!  It really does take only about 10 minutes.  When I first saw this recipe I was a little skeptical.  I did not truly think they would be that easy to make and taste so yummy!!!  They are also very addicting, you will know what I mean after you take your first bite…… These would be perfect to take to a party.  You would be the hit of the party.  I took mine to a luncheon and everyone that had one LOVED them!!!!

IMG_3721

Cake Batter Fudge

Source

Ingredients

Instructions Mix cake mix and icing sugar in microwave-safe bowl. Add butter and milk. Don’t stir.
Microwave for 2 minutes. Stir immediately until completely combined. Add sprinkles. Do not overmix as sprinkle colour may bleed.
Spread into greased pan. Refrigerate for at least one hour.
* Makes one 6 x 6” container, or double for an 8 x 8” pan. ** Notes: If the batter comes out too runny, stir in about 1 tsp or sugar or cake mix at a time until stiff. If too thick to stir in all components, slowly add 1/2 tsp of milk at a time, but batter should be thick!

IMG_3716

This is all you need to make this recipe.

IMG_3715

IMG_3717

Put your confectioners sugar and cake mix into a microwave safe bowl.  Mix it up.  Then add your milk and butter. Do not stir this.  I doubled the recipe so I used 1 stick of butter, 2 cups of confectioners sugar, 2 cups + 2 tbsp. cake mix, but only 1/4 cup of milk.  I also used a cake mix that already had sprinkles so I did not add very many more sprinkles.

IMG_3718

Microwave for 2 minutes.  Remove from microwave and stir until completely combined.  This is where you add your sprinkles.

IMG_3719

Pour into an 8×8 greased pan. I lined mine with non-stick foil.

IMG_3720

Refrigerate for at least one hour.

IMG_3722

This is what it will look like when it has set.  It smells as good as it taste!!!  🙂  Cut it in to whatever size pieces you like.  I now know I have a quick go to recipe for when I need something to make and not a lot of time to make it.

I give this recipe plus out of 4……

Dulce de Leche Brownies

Published February 27, 2013 by thepinkgourmet

If you are looking for a chocolate brownie with dulce de leche then this is the recipe for you. It has everything you are looking for. It has a deep dark chocolate taste with a caramel center. Who doesn’t like chocolate and caramel? This is a really easy recipe to make. Once you have made this I am sure it will become one of your favorites!!!

IMG_3712

Dulce de Leche Brownies

Source

Adapted from The Sweet Life in Paris (Broadway Books)                                                                                                                                      David Lebovitz

Ingredients: 8 tablespoons salted or unsalted butter, cut into pieces 6 ounces semisweet chocolate, finely chopped 1/4 cup unsweetened Dutch-process cocoa powder 3 large eggs 1 cup sugar 1 teaspoon vanilla extract 1 cup  flour optional: 1 cup toasted pecans or walnuts, coarsely chopped 1 cup Dulce de Leche

Cooking Directions:

Preheat the oven to 350 degrees.

Line a 8-inch square baking dish with a sheet aluminum foil that covers the bottom  up over the sides. If it doesn’t reach all the way up and over all four sides, cross another sheet of foil over it, making a large cross with edges that overhang the sides. Spray the bottom and sides of the foil with cooking spray.

In a saucepan melt butter, add the semi-sweet chocolate, stirring constantly over very low heat until the chocolate is melted. Remove from heat and whisk in the cocoa powder until smooth. Add in eggs one at a time, then stir in the sugar, vanilla, then the flour and nuts if using.

Pour half of the batter into baking dish.  Spoon one-third of the Dulce de Leche, over the brownie batter evenly in dollops, then drag a knife or spatula through and swirl. Pour the remaining brownie batter over, then spoon the remaining Dulce de Leche in dollops over the top of the brownie batter. Use a knife or spatula to swirl the Dulce de Leche creating a marbled effect.

Bake for 35 to 45 minutes. The brownies center will be slightly firm when they are done. Remove from the oven and allow cool completely.

Enjoy!

IMG_3690

The first thing you need to do is line an 8×8 pan with foil.  I used no stick foil so I did not have to spray it.

IMG_3691

IMG_3692

IMG_3694

IMG_3694

IMG_3695

Melt your butter over low heat and then add your semi-sweet chocolate. (My chips look like that because they had been in the refrigerator) Stir until the chocolate is melted and smooth.

IMG_3697

Remove from the heat and whisk in your cocoa until smooth.

IMG_3699IMG_3700

Add in eggs one at a time.  It should look like this after adding them.

IMG_3701

IMG_3702

IMG_3703

Next, stir in your sugar, vanilla and then flour.

IMG_3704

Pour half of the brownie batter into your pan.

IMG_3706

IMG_3707

IMG_3708

Add 1/3 of the dulce de leche in dollops on top of your batter.  Take a knife and drag it through the batter making a marbled effect. Add the rest of the batter on top and then add the rest of the dulce de leche to the top of the remaining batter.  Repeat dragging the knife through the batter and making a marbled effect.  Bake in a 350 degree oven for about 35-45 minutes.

IMG_3713

Cool completely before cutting.  Be ready for a wonderful treat!!!

I give this recipe plus out of 4……

Glazed Doughnut Muffins

Published February 24, 2013 by thepinkgourmet

I did not know what to expect when I saw the title of this recipe.  I wasn’t sure if they would taste more like a muffin or a doughnut.  I think the glaze made them taste more like a doughnut than a muffin. The inside is dense and cake like a doughnut. I was pleased with these!!

IMG_3649

Glazed Doughnut Muffins

Source

For the Batter 1/4 cup butter 1/4 cup vegetable oil 1/2 cup granulated sugar 1/3 cup brown sugar 2 large eggs 1 1/2 teaspoons baking powder 1/4 teaspoon baking soda 3/4 to 1 ¼ teaspoons ground nutmeg, to taste (I used ¾) 1 teaspoon cinnamon 3/4 teaspoon salt 1 teaspoon vanilla extract 2 2/3 cups all-purpose flour 1 cup milk

For the Glaze 3 tablespoons butter; melted 1 cup confectioners’ sugar; sifted 3/4 teaspoon vanilla 2 tablespoons hot water

Directions 1) Preheat the oven to 425°F. Lightly grease a standard muffin tin. Or line with 12 paper muffin cups, and grease the cups with non-stick vegetable oil spray; this will ensure that they peel off the muffins nicely. 2) In a medium-sized mixing bowl, cream together the butter, vegetable oil, and sugars till smooth. 3) Add the eggs, beating to combine. 4) Stir in the baking powder, baking soda, nutmeg, cinnamon, salt, and vanilla. 5) Stir the flour into the butter mixture alternately with the milk, beginning and ending with the flour and making sure everything is thoroughly combined. 6) Spoon the batter evenly into the prepared pan, filling the cups nearly full. 7) Bake the muffins for 15 to 17 minutes, or until they’re a pale golden brown and a cake tester inserted into the middle of one of the center muffins comes out clean. 8.) In a medium bowl, prepare the glaze by mixing together the melted butter, confectioners’ sugar, vanilla and water. Whisk until smooth. 9.) When muffins have cooled slightly, dip the muffin crown into the glaze and allow the glaze to harden. At this point, you can leave them as is or go for the double dip. I glazed my muffins twice. 10.) Serve warm, or cool on a rack and wrap airtight. Muffins will keep at room temperature for about a day

IMG_3629 IMG_3630

The first step is to put your butter, sugars, and vegetable oil into a medium size mixing bowl.

IMG_3631

Cream till smooth.

IMG_3632

Next add your eggs.

IMG_3633

Beat the eggs till well combined.  The batter will be thin.

IMG_3634 IMG_3635

Next add in your baking soda, baking powder, nutmeg, cinnamon, salt, and vanilla.

IMG_3636

It says to stir in these ingredients but I used my hand mixer on speed #1.

IMG_3637 IMG_3638 IMG_3639 IMG_3640

Next alternately add in your flour and milk and beginning and ending with the flour till well combined.

IMG_3641

Spoon into your muffin pan. Bake at 425 degree for about 15-17 minutes.

IMG_3642

Look how yummy these look.  At this stage they just look like an ordinary muffin, but just wait!!!

IMG_3643

IMG_3644

While the muffins are cooling it’s time to make the glaze.  Put the powdered sugar, hot water, melted butter and vanilla into a small bowl. Whisk until smooth.

IMG_3645

Dip the tops of each muffin into the glaze and swirl it around.  Let the glaze harden before you eat them.

IMG_3646

I took mine to school and I can tell you they did not last long.  These would be great for a morning meeting. If you brought these to the meeting no one would even care what the meeting was about!!!

I give this recipe plus out of 4……

Spiced Pork Chops with Sweet and Sour Glaze

Published January 14, 2013 by thepinkgourmet

These are no ordinary Pork Chops.  They are very tender and the flavor of the glaze is wonderful over the chops!  I think using bone-in chops is what makes these chops so good. I think you could use boneless ones as long as they are a good cut and you do not over cook them.  I served mine with Jasmine Rice and pineapple chunks.  The glaze was yummy over the rice!  These are really easy to make and do not take a lot of time.  You will not be disappointed with this recipe.

IMG_3362

Spiced Pork Chops with Sweet and Sour Glaze (Agrodolce) – Source

Spiced Pork Chops with Sweet and Sour Glaze (adapted from Giada De Laurentiis):

Yields 2 servings

  • 1/4 cup balsamic vinegar
  • 1/4 cup honey
  • 1 clove garlic, minced
  • 2 scallions, pale green and white parts only, finely chopped
  • 1/2 teaspoon fresh rosemary leaves, chopped
  • 2 tablespoons unsalted butter, cut into 1/2-inch cubes, at room temperature
  • Kosher salt and freshly ground black pepper, to taste
  • 2 tablespoons olive oil, plus extra as needed
  • 2 pork chops, 1 1/2 inches thick, bone-in
  • 1/2 teaspoon crushed red pepper flakes, or more to taste

In a small saucepan, bring the vinegar, honey, garlic, scallions, and rosemary to a boil over medium-high heat, stirring occasionally, until the honey has dissolved. Simmer for 9 minutes, or until slightly reduced.  Remove the pan from the heat and whisk in the butter until smooth. Season with salt and pepper, to taste.  Heat olive oil in a medium skillet over high heat.  Season the pork chops with salt and pepper, to taste, and sprinkle with the red pepper flakes.  Add the pork to the pan and cook until cooked through, about 5 to 6 minutes on each side.  Arrange the pork chops on a platter and drizzle with the glaze.

IMG_3348

The first thing I did was chop my green onions, rosemary leaves and mince my garlic.

IMG_3349         IMG_3352

Next I put my honey, Balsamic Vinegar, garlic, rosemary and green onions into a saucepan.

IMG_3354       IMG_3355

Heat until it comes to a boil and then simmer for about 9 minutes and it reduces a little.

IMG_3357

After about 9 minutes add your butter and salt and pepper to taste. I turned off the glaze after adding the butter.

IMG_3353

Now it’s time to prepare your chops.  Season your chops with salt, pepper and red pepper flakes to taste.

IMG_3358

Brown in olive oil on high heat about 4-6 minutes on each side.

IMG_3359

This is what they look like when they are done.

IMG_3361

Now you are ready to plate your chops and pour your glaze over the chops.  Look how rich the glaze looks.  I think you will be surprised with how well the flavors blend together.   I plan on adding this to my list of favorites!     Bon Appetit!!!!!

I give this recipe plus out of 4……

Mocha Bundt Cake with Dark Chocolate Glaze

Published January 2, 2013 by thepinkgourmet

This is a great Chocolate Mocha Bundt Cake! It is really deep, dark and rich in flavor.  It is not a cake that can be made quickly, but it is well worth the time it takes to make it.

IMG_3276

Mocha Bundt Cake with Dark Chocolate Glaze

Source

Cake:
1 1/4 cup plus 1 tbsp brewed strong coffee
3/4 cup Dutch process cocoa powder
2 1/4 cup granulated sugar (I used natural cane sugar and it turned out great)
1 1/4 tsp salt
2 1/2 tsp baking soda
2 whole eggs
1 egg yolk
1 1/4 cup plus 1 tbsp buttermilk
1 cup plus 2 tbsp canola oil
1 1/2 tsp pure vanilla extract
2 1/2 cups plus 2 tbsp all purpose flour
Glaze:
4 ounces (120grams) 70% dark chocolate, chopped
1/2 cup butter
2 cups icing sugar
1/3 cup sour cream, at room temp
1/4 cup (scant) of strong brewed coffee, cooled
To make the cake:  Place oven rack in center of oven and preheat it to 350*F.  Butter and flour a 10-inch Bundt pan and set aside.
To make the batter, put brewed coffee and cocoa in small saucepan and bring it to boil, whisking constantly.  Remove pan from heat and let it come to room temp.  In the bowl of a mixer, with the whisk attachment, mix sugar, salt, baking soda, eggs and yolk on low speed for 1 minute.  Add the buttermilk, oil and vanilla and mix on low for another min.   Add the flour and mix on medium for 2 minutes.  Add the cooled cocoa mixture and mix on medium for 3 minutes.  Don’t forget to scrape the sides down after each addition.  Whew!  The batter will be kinda loose.  Pour it into your prepared pan and bake for 1 hour or until a toothpick comes out clean.  Let the cake cool completely then invert onto cooling rack.
To make the glaze:  melt butter in small saucepan and remove to a bowl.  In the same pan, melt chocolate over very low heat, stirring constantly.  Pour chocolate into large mixing bowl.  Whisk in the melted butter and sift in half the icing sugar.  Add the sour cream and whisk to combine.  Sift in remaining sugar and whisk until smooth, thick and shiny.  Add the coffee and whisk some more, so it’s all glossy.  If you find it too thick, thin with a tiny bit of milk.  If too thin, add more icing sugar.  Pour the glaze over your cake, and take a picture.  Super gorgeous.  Serves about 8-10.  Recipe adapted from Joy the Baker and The Big Sur Bakery Cookbook.
For strawberry sauce:  Place 2 cups thawed strawberries in food processor or blender.  Process until smooth.  Pour into a small saucepan.  Add 3 tsp sugar and bring to a boil, reduce and simmer 5 minutes.  Cool, and serve with cake.

IMG_3235

IMG_3236

IMG_3237

The first thing you need to do is put your coffee and cocoa into a small saucepan and bring it to a boil.  Make sure you whisk it constantly.  Once it boils set it aside to cool to room temperature.

IMG_3241

IMG_3242

IMG_3244

Place sugar, salt, baking soda, eggs and yolk into a large mixing bowl.  Mix about 1 minute on low just till combined.

IMG_3245

IMG_3246

Add the buttermilk, oil and vanilla and mix on low for another minute.

IMG_3247

Next add in your flour and mix on medium for about 2 minutes.

IMG_3248

IMG_3249

Add your cooled chocolate mixture and mix for about 3 minutes more.

IMG_3250

IMG_3251

Pour into your Bundt pan.  Bake in a 350 degree oven for about 45 minutes to 1 hour  until a toothpick comes out clean.

IMG_3252

Let it cool completely in the pan before removing it.

IMG_3253

IMG_3254

Look how pretty it looks!!!!

IMG_3259

IMG_3261

Now it’s time to make the glaze.  Melt your butter in a small saucepan  and then pour into a small bowl.

IMG_3262

Next melt your chocolate in the same pan that the butter was in.

IMG_3263

IMG_3266

IMG_3267

IMG_3268

Pour the chocolate into a medium size bowl and whisk in your melted butter and half of your powdered sugar.

IMG_3269

IMG_3270

Whisk in your sour cream.  The glaze will begin to get shiny.

IMG_3274

Add the coffee and whisk until the glaze is glossy.

IMG_3277

IMG_3278

IMG_3279

Pour the glaze over your cake and then your ready for a real treat!   I think you will really enjoy this cake.

I give this recipe plus out of 4……

Warm Chocolate Pudding Cakes with Caramel Sauce

Published December 31, 2012 by thepinkgourmet

What a way to end 2012!  These little cakes are amazing…  How can you go wrong with chocolate, caramel and whipped cream?  They are very rich and so worth all the calories!!!   Happy New Year to all my readers and their families!  I hope 2013 is a great year for you all.  🙂

IMG_3233

Warm Chocolate Pudding Cakes with Caramel Sauce

Source

Yield

Serves 4

Ingredients

  •                                          6 tablespoons (3/4 stick) cold unsalted butter, cubed, plus more, room temperature, for ramekins
  •                                         1/3 cup sugar, plus more for ramekins
  •                                         6 ounces bittersweet chocolate, chopped
  •                                         2 large eggs plus 2 large egg yolks
  •                                         1/4 cup all-purpose flour (spooned and leveled)
  •                                         1/2 teaspoon coarse salt
  •                                         Caramel Sauce, for serving
  •                                         Whipped cream, for serving

Directions

  1. Preheat oven to 350 degrees. Butter four 6-ounce ramekins, then coat lightly with sugar, tapping out excess. In a microwave-safe bowl, combine butter and chocolate. Microwave until melted, about 1 minute; stir until smooth. (Or melt mixture in a heatproof bowl set over, not in, a pan of simmering water.)
  2. In a large bowl, whisk together sugar, eggs, yolks, flour, and salt; add chocolate mixture and whisk to combine. Fill each ramekin three-quarters full with batter; place on a rimmed baking sheet and refrigerate 15 minutes.
  3. Bake until center of a cake is soft but not wet when pressed, 27 to 30 minutes. Let cool 5 minutes. Serve cakes warm, topped with caramel and whipped cream.

Cook’s Note

For the best texture, don’t overbake the cakes. Lightly coating the ramekins with sugar helps the cakes rise as they bake and makes them easy to unmold before serving, if you like

IMG_3213 IMG_3214

The first thing you want to do is get your ramekins ready.  Butter and coat with granulated sugar and set aside.

IMG_3216

IMG_3217

IMG_3220

Put your chocolate and butter into a microwave safe bowl.  Microwave until melted about 1 minute.  Stir until smooth.

IMG_3218

IMG_3219

IMG_3221

IMG_3222

Put your flour, sugar, salt, eggs, and yolks into a large bowl.  Whisk until combined.

IMG_3223

Add your melted chocolate to the egg and flour mixture.  Whisk this until well combined.

IMG_3225

This is what it should look like when it is well combined.

IMG_3227

Pour into the ramekins and refrigerate 15 minutes.

IMG_3229

Bake in a preheated 350 degree oven for about 27-30 minutes  or until center is soft.  Let cool for 5 minutes before you remove from ramekins.  They should slide out easily onto a serving plate.

IMG_3231

Spoon on your caramel sauce on to the top of each cake.  You can either make your own caramel sauce or use your favorite in a jar.

IMG_3232

Next put a dollop of whipped cream on the top of each cake.  Now your ready to enjoy!  You are in for a real treat!!!!!!

I give this recipe plus out of 4……

Nutmeg and Black Pepper Popovers

Published December 30, 2012 by thepinkgourmet

These popovers are as light as air but very flavorful!  The nutmeg and black pepper turn an ordinary popover into a spectacular one.  I even added a little bit of Gruyère cheese to add another layer of flavor to them.  They are really easy to make and can be made in a popover pan or muffin pan.

IMG_3206

Nutmeg and Black Pepper Popovers

Source

For an intensified flavor, substitute duck fat for the melted butter.

Makes 12

Whisk 2 cups all-purpose flour, 2 tablespoons finely chopped flat-leaf parsley, 1 tablespoon kosher salt, 1 teaspoon freshly ground black pepper, and 1 teaspoon freshly grated nutmeg in a medium bowl. Whisk 3 large eggs and 2 1/2 cups whole milk in a large bowl until well blended. Gently whisk in flour mixture, followed by 3 tablespoons melted unsalted butter (do not overmix). DO AHEAD: Batter can be made 1 day ahead. Cover and chill.
  • Preheat oven to 425°. Melt 2 tablespoons unsalted butter; grease 12 standard muffin cups with 1/2 teaspoons melted butter each. Pour batter into prepared muffin tins, filling cups three-quarters full and dividing equally. Bake popovers until puffed, golden brown, and crispy around edges, 30-35 minutes. Using a thin knife or an offset spatula, remove popovers from pan. Serve immediately.

IMG_3194

IMG_3195

IMG_3197

The first step is to add your flour, salt, black pepper, grated nutmeg, and flat-leaf parsley to a medium bowl.  Whisk all those ingredients together.

IMG_3200

IMG_3198

IMG_3202

IMG_3201

IMG_3203

Whisk your eggs and whole milk in a large bowl till well blended.  I also added my duck fat to this.  You can use melted, unsalted butter but I had the duck fat on hand so I used it.  It does add a more intensified flavor.  (William Sonoma sometimes carries duck fat)

IMG_3196

I mixed in the grated Gruyère cheese with the dry ingredients right before I added the milk and egg mixture.

IMG_3204

IMG_3205

Whisk the milk and eggs mixture into the flour mixture just until combined.  You do not want to overmix.

IMG_3211

Pour batter into your muffin or popover pans and bake at 425 degrees for 30-35 minutes until brown, and crispy around the edges.

IMG_3210

IMG_3207

IMG_3208

They really are incredible!  Make sure you serve these with a good butter…..  Bon Appetit!

I give this recipe plus out of 4……

Candy Cane Blossoms

Published December 26, 2012 by thepinkgourmet

These are the most adorable looking cookies.  They taste as good as they look as well. These are a fun cookie to make.  They taste like a sugar cookie with a surprise mint flavor in the middle. The Candy Cane Kisses are delicious on their own, but when you add them to the cookies they are even better.  I will definitely add these to my list of holiday cookies to make each year.

IMG_3122

Candy Cane Blossoms

Source

recipe from Hershey’s
1 bag Hershey;s Kisses brand Candy Cane Kisses
1/2 cup butter, softened
1 cup granulated sugar
1 1/2 teaspoons vanilla extract
1 egg
2 cups all purpose flour
1/4 teaspoon salt
1/4 teaspoon baking soda
2 tablespoons milk
Red and Green colored sugar
Preheat over to 350 degrees Fahrenheit.  Remove wrappers from candies (approx. 35)
Beat butter, sugar, vanilla, and egg in large bowl until well blended.  Stir together flour, baking soda and salt; add alternatively with milk to butter mixture, beating until well blended.
Shape dough into 1 inch balls.  Roll in red and/or green colored sugar.  Place on ungreased cookie sheet.
Bake 8 – 1o minutes or until edges are lightly browned and cookies is set.  Remove from oven; cool 2 to 3 minutes.  Press candy piece into center of each cookie.  Remove from cookie sheet to wire rack.  Cool completely.  Yields approximately 35 cookies.
IMG_3106
The first step is to put your butter, sugar, egg, and vanilla into a mixing bowl.
IMG_3107
Beat until well blended.
IMG_3108
The next thing you need to do is combine your flour, baking soda, and salt.  Also, put your milk into a small prep bowl.
IMG_3109                 IMG_3110
Add the flour and milk alternatively to the butter mixture.  Make sure you cream this well.
IMG_3111
It will look like this when you add the first additions of the flour and milk.
IMG_3114
When you get it all incorporated in it will look something like this.
IMG_3112                   IMG_3113
Next get out whatever colored sugar you are going to use to roll these in.
IMG_3115
IMG_3116
IMG_3117
Shape the dough into 1 inch size ball and roll into the colored sugar of your choice.
IMG_3118
Put onto a cookie sheet and bake 8-10 minutes or until lightly brown  in a preheated 350 degree oven.
IMG_3119
They should look like this when they are done.  Let cool 2-3  minutes on cookie sheet.
IMG_3121
After the 2-3 minutes press a Candy Cane Kiss onto the center of each cookie, remove to a wire rack to cool completely.  Then you are ready to enjoy them!
I give this recipe plus out of 4……

Italian Christmas Cookies Recipe

Published December 23, 2012 by thepinkgourmet

These are one of my favorite cookies to make for the Holiday!  Ricotta cheese is a nice addition to these cookies.  They are a very moist cookie.  You can either frost or not frost them, they are great both ways.  They are also very easy to make and make a lot of cookies, which make a good recipe to take to a Holiday Party or to a cookie exchange.  I bet if you try these they will become one of your favorites.

IMG_3087

Italian Christmas Cookies Recipe

Source

Ingredients

Directions

  • In a bowl, cream butter and sugar. Add the eggs, one at a time, beating well after each addition. Beat in ricotta and vanilla. Combine flour, salt and baking soda; gradually add to creamed mixture.
  •    Drop by rounded teaspoonfuls 2 in. apart onto greased baking sheets. Bake at 350° for 10-12 minutes or until lightly browned. Remove to wire racks to cool.
  •    In a bowl, cream butter, sugar and vanilla. Add enough milk until frosting reaches spreading consistency. Frost cooled cookies and immediately decorate with sprinkles. Store in the refrigerator. Yield: 8-1/2 dozen.

IMG_3068

Put your softened butter and sugar into a large bowl.

IMG_3069

Cream well!

IMG_3070

Add eggs one at a time.

IMG_3071

Beat well after each addition.

IMG_3072               IMG_3073

Next add your ricotta cheese and vanilla.

IMG_3074

It should look like this after you beat it. It will be really fluffy at this time.

IMG_3075

Slowly add in your flour, baking soda, salt, and I also add a teaspoon of baking powder.

IMG_3076

Mix until the flour is well incorporated.

IMG_3077

Drop by teaspoonfuls onto greased or parchment lined baking sheets.

IMG_3078

Bake in a 350 degree preheated oven for 9-11 minutes or until light brown.

IMG_3081

While cookies are cooling make the frosting.  Put all ingredients for the frosting into a bowl and mix until smooth.  You may have to adjust the powdered sugar and milk to get it just right.

IMG_3082         IMG_3083

If you like you can add food coloring to the frosting.

IMG_3087

I did add food coloring to my frosting.  I think it makes the cookies look beautiful!  I hope you will enjoy these as much as I do.

I give this recipe plus out of 4……

White Chocolate Peppermint M&M Cookies

Published December 17, 2012 by thepinkgourmet

I am in the Holiday Spirit!!  I have started making my Christmas Cookies. I am really in to Candy Canes, Mint, and White Chocolate.  These cookies have a combination of those things.  The flavor in these cookies is delightful!!! The mint flavor is not too strong.  They are also really easy to make. I guarantee if you take these to a holiday party they will be a big hit.

IMG_3011

White Chocolate Peppermint M&M Cookies

Source

Yield: 2 1/2 dozen cookies

Prep Time: 10 minutes

Cook Time: 10-12 minutes

Cookies with White Chocolate Peppermint M&M’s, candy canes, and white chocolate chips. These cookies are festive and perfect for the holiday season!

Ingredients:

3 cups all-purpose Gold Medal flour 1/2 teaspoon salt 3/4 teaspoon baking soda 1 cup unsalted butter, at room temperature 1 cup light brown sugar 1/2 cup granulated sugar 2 large eggs 1 tablespoon vanilla extract 1 cup white chocolate chips 1/2 cup crushed candy canes 1 cup White Chocolate Peppermint M&M’s

Directions:

1. Preheat oven to 350°F. Line a large baking sheet with a Silpat baking mat or parchment paper and set aside.

2. Combine flour, salt and baking soda in a medium bowl and set aside.

3. Cream butter and sugars together in a stand mixer fitted with the paddle attachment until combined. Add eggs and vanilla and beat until smooth. Slowly mix in the dry ingredients. Stir in the white chocolate chips, candy canes, and M&M’s.

4. Drop heaping tablespoonfuls of dough on prepared baking sheets, about 2 inches apart. Bake for 10-12 minutes or until cookies are golden around the edges, but still soft in the center. Let the cookies cool on the baking sheet for 2 minutes. Transfer cookies to wire rack and cool completely.

Note-a few people commented that they made these cookies and they were too puffy and a little dry. You can try reducing the flour to 2 1/2 cups if you have this problem. I used 3 cups of flour though and they were just fine.

IMG_2993

The first step is to combine your flour, baking soda and salt in a medium bowl.

IMG_2994

Next put your softened butter, brown and granulated sugar in a large bowl.

IMG_2995

Cream until well combined.  You can mix it with a hand mixer or a stand mixer.

IMG_2996

Add your eggs and vanilla and beat well.

IMG_2997

Looking good!!

IMG_2998

Next add your dry ingredients slowly to the bowl and mix until well combined.

IMG_2999

It should look like this!!

IMG_3001

You are now ready to add in your white chocolate chips, crushed candy canes and White Chocolate Peppermint M & M’s.

IMG_3002

It doesn’t get any better than this…..

IMG_3003

Drop by heaping tablespoons onto a greased or parchment lined baking sheet.  I used a cookie scoop. Bake in a preheated oven for about 10-12 minutes at 350 degrees.  You want the cookies to be golden around the edges but soft in the middle.

IMG_3004

Transfer your cookies to a metal rack to cool.  If you are like me, I had to have a cookie warm from the oven.  All I can say about these is YUM, YUM, YUM!

I give this recipe plus out of 4……

Ice Box Rolls

Published November 25, 2012 by thepinkgourmet

There is nothing better than making homemade dinner rolls and sweet rolls that are a family recipe!!  This recipe is a staple at our house for Thanksgiving. This recipe is not a quick bread.  It is a yeast bread and has to be kneaded. This was my grandmother’s recipe.  I can still remember her making it and her giving me a little pinch of dough to do what I pleased with. I Love the smell of rising bread.   It is well worth the time it takes to make it.

Ice Box Rolls (Family recipe)

1 cup sugar

1 stick butter

½ cup Crisco

2 teaspoons salt

1 cup mashed potatoes

2 cups milk heated until it bubbles around the edges

3 eggs

2 pkg yeast

½ cup warm water

Scant spoon of sugar

3 ½ cups flour

Mix the yeast and warm water with a scant spoon of sugar.  Let this stand till doubles in bulk and bubbles.

Add the sugar, butter, Crisco, salt, mashed potatoes and milk in a large bowl.  Stir till the butter and Crisco are absorbed.  Cool till room temperature.  Add the flour and mix well.  Add the eggs and beat well.  Add the yeast to the flour mixture.  Stir till you get a smooth batter.  Let this stand for about 1 hour or until doubles in volume.

Sift 3 cups of flour with 1 teaspoon soda and 2 teaspoons baking powder.

Stir down the batter and add this flour to the batter.  Now you will need more flour to make a soft dough.  Sift 3 more cups of flour and add this to the dough.  You want a soft dough.  Knead this by hand until it is easy to handle but not stiff.  You will need to incorporate more flour.  The dough should be elastic and spring back when you touch the center of the dough.

Now it is time to roll out the dough.  You can either make sweet rolls or dinner rolls.  Let the rolls rise for about an hour after you shape them.  Bake them at 375 degree for about 12-15 minutes or until done.

P.S.  These are called ice box rolls because you can refrigerate any dough you do not use for up to 2 to 4 days.  Make sure if you do this you completely let the dough get to room temperature before you roll it out.

The first thing you need to do is make mashed potatoes.  I made mine from real potatoes and not boxed.

You want to get your eggs out so they will be a room temperature when you need them.  I usually crack them and place them in a bowl.

Place your butter, Crisco, sugar and salt into a large bowl.


Next prepare your yeast. Add  2 pkg. yeast with 1/2 cup warm water and a spoonful of sugar in a medium bowl.  Stir together and set aside till it doubles in volume and starts to bubble.

Go ahead and measure 3 1/2  cups of flour and set aside.


Add the mashed potatoes to your big bowl with the Crisco, butter, sugar and salt.  I mix this with a spoon before I add anything else.


Add your heated milk to the big bowl.  Stir this til the butter and Crisco are mostly absorbed.  Then cool to room temperature.


Stir in the flour.


Next, beat in your eggs.


Add the yeast to the flour mixture.  Stir till you get a smooth batter.

Let this stand for about 1 hour or until doubles in volume.


After about an hour you need to sift 3 cups of flour with 1 teaspoon soda and 2 teaspoons baking powder.

Stir down the batter and add this flour to the batter.


Sift 3 more cups of flour and add this to the dough.  You want a soft dough.


Turn the dough out onto the counter and knead the dough till easy to handle and not stiff.  You will need to add more flour as you knead.

The dough should look something like this and when you touch it in the center it should be a little elastic and spring back when you touch it.


Roll out your dough and use a biscuit cutter to make dinner rolls. Place on a greased baking dish and let rise for about an hour before you bake them.


You can also make cinnamon(sweet) rolls if you like.  Roll out dough into a rectangular shape and spread melted butter and cinnamon sugar on top.


Roll up your rectangle of dough. I roll mine on the long end.

Cut the dough into rolls the size you like.  Put these on a greased baking pan and let rise for about an hour.


After about an hour your rolls and sweet rolls should be double in size. Bake in a 375 degree oven for about 12 to 15 minutes or until done.


There is nothing left to say than just enjoy!!!!!!

I give this recipe plus out of 4!!

Moist Chocolate Cake

Published November 22, 2012 by thepinkgourmet

Happy Thanksgiving!!  What better way to end Thanksgiving than with  a Chocolate Cake.  This cake is really dark, moist and has a deep chocolate taste.  One of the best things about this cake is that it is almost a one-bowl cake.  You can whip this up in a short amount of time.  This one is for sure going on my make again list!!

Moist Chocolate Cake

Source

Moist Chocolate Cake
Author: Jennifer Hill
Recipe type: Dessert
Prep time:  15 mins
Cook time:  35 mins
Total time:  50 mins
Serves: 12
Ingredients
  • 1¾ cups all purpose flour
  • 2 cups granulated white sugar
  • ¾ cup unsweetened cocoa powder
  • 1½ tsp baking soda
  • ¾ teaspoon salt
  • 2 large eggs
  • 1 cup buttermilk (or substitute by putting 1 tbsp white vinegar in a cup then filling the rest up with milk; let stand 5 minutes until thickened)
  • ½ cup butter, melted
  • 1 tbsp vanilla extract
  • 1 cup freshly brewed hot coffee (or 2 tsp instant coffee in 1 cup boiling water)
Instructions
  1. Preheat oven to 350 degrees. Grease and flour two 9-inch baking pans (or line with parchment paper circles) and set aside.
  2. In the large bowl of a standing mixer, stir together flour, sugar, cocoa, baking soda, and salt. Add eggs, buttermilk, melted butter and vanilla extract and beat until smooth (about 3 minutes). Remove bowl from mixer and stir in hot coffee with a rubber spatula. Batter will be very runny.
  3. Pour batter evenly between the two pans and bake on middle rack of oven for about 35 minutes, until toothpick inserted in center comes out clean with just a few moist crumbs attached.
  4. Allow to cool 15 minutes in pans, then run a butter knife around the edges of each cake. Place a wire cooling rack over top of each pan. Wearing oven mitts, use both hands to hold the racks in place while flipping the cakes over onto the racks. Set the racks down and gently thump on the bottom of the pans until the cakes release. Cool completely before handling or frosting.
  5. *UPDATE: I have had many many commenters requesting the frosting recipe – I did not record the measurements. It was simply softened butter beaten with unsweetened cocoa powder, icing sugar, a pinch of salt, vanilla extract and a splash of cream, adjusting the ingredients until I got the right consistency and sweetness. Happy Baking!


The first step is to put your dry ingredients into a large bowl.


Stir this with a spoon until it resembles a powder consistency.


Next add your buttermilk, eggs, vanilla, and melted butter.

Beat with the mixer for about 3 minutes until smooth.


Stir in the coffee.  The batter will be thin.

Pour into your cake pans and bake at 350 degrees for about 30-35 minutes.

Look how yummy these look!!!  Did you notice the heart outline in the middle of the pans?

Take out of cake pans and cool on a metal rack.

Let the cake cool before you frost it.  Use your favorite frosting.

I grated some chocolate for the top of my cake.

Your ready to cut and eat your cake now.  I can almost taste it. I hope you will enjoy this cake as much as my family did.

I give this recipe plus out of 4……

Chocolate Chip Gooey Butter Cake

Published October 31, 2012 by thepinkgourmet

Happy Halloween!   On this day I always want something ooey and gooey!  This fits the bill.  It has everything I want.  I only make this recipe a couple of times a year since it is so rich.  I know it does not look that wonderful but the taste will knock your socks off……

Chocolate Chip Gooey Butter Cake

Source

Crust
1 box butter-recipe cake mix
1 egg
1/2 c (1 stick) butter, melted

Filling
1 8 oz. pkg cream cheese, softened
2 eggs
1 tsp. pure vanilla extract
1 16 oz. box powdered sugar
1/2 c. (1 stick) butter, melted
1 c. chocolate chips
Preheat oven to 350 degrees.  Light grease a 9×13 in. baking pan.
In a bowl, combine cake mix, egg, and butter with an electric mixer.  Mix well.  Pat into the bottom of prepared pan and set aside.  Still using an electric mixer, beat cream cheese until smooth; add eggs and vanilla.  Dump powdered sugar and beat very well.  Reduce the speed of mixer and slowly pour in melted butter.  Mix well.  Stir in the chocolate chips. Pour filling onto cake mixture and spread evenly.  Bake for 40-50  minutes (it took me closer to 50 minutes).  You want to center to be a little gooey, so don’t bake it past that point!  Remove from oven and allow to cool completely.  If you want to drizzle melted chocolate over the top allow it to cool for at least 15 minutes and then drizzle over.  Allow to cool for at least another hour and then cut into bars.  Enjoy!


The first thing you need to do is put your cake mix, egg, and melted butter into a mixing bowl. Your cake mix does not have to be butter recipe, I have used a white and yellow one before.

Mix this well with a mixer.  It should look like this.

Pat the dough into the bottom of a 13×9 inch greased pan.  Set this aside till you make the filling.


To make the filling, the first step is to mix the cream cheese until smooth.


Add the eggs and vanilla and mix well.

Next, dump in your powdered sugar.

You need to mix this up well.


Add your melted stick of butter to this mixture.

Mix the butter in till well incorporated.


Add your chocolate chips.  I used mini ones but you can use the regular size.

Pour the filling over the crust and spread until entire crust is covered.

Bake in a 350 degree oven for about 40-50 minutes.  You want it to be a little bit gooey in the center.  DO NOT OVER BAKE.  Let this cool for a little while before you cut it.  You can add a chocolate drizzle over them if you like.  I chose not to.  Remember I mentioned that they don’t look pretty, but once you taste them you won’t care what they look like. 🙂

I give this recipe plus out of 4……

Peanut Butter Cup Pudding

Published October 28, 2012 by thepinkgourmet

If you like peanut butter, Reese’s Peanut Butter Cups and pudding this is the dessert for you.  This is really quick to prepare and it is delicious as well! I whipped this up after the loss of the OU-Notre Dame Football game.  I needed something sweet to end the night……

Peanut Butter Cup Pudding

Source

INGREDIENTS:

  • 12 to 16 REESE’S Peanut Butter Cups Miniatures
  • 1-3/4 cups milk, divided
  • 1 package (4-serving size) vanilla instant pudding and pie filling mix
  • 1/4 cup REESE’S Creamy Peanut Butter

DIRECTIONS

  1.  Remove wrappers from peanut butter cups and coarsely chop. Set aside.
  2.  Gradually add 1/2 cup milk to pudding mix in small bowl, beating until well blended. Add peanut butter, blending until mixture is smooth. Gradually add remaining 1-1/4 cups milk, beating until mixture is smooth and pudding begins to thicken (about 3 minutes). Fold in candy pieces. Spoon pudding into serving dishes.
  3.  Cover; refrigerate until ready to serve. Garnish as desired. Refrigerate leftover pudding. About six 1/2 cup servings.


The first step is to chop up your miniature  peanut butter cups.  I could just eat these and be happy!!!  🙂


Next add 1/2 cup of milk to your pudding mix.

Beat until well blended.


Add the peanut butter and blend until smooth.


Add remaining milk a little at a time and mix until it is smooth and pudding starts to thicken. (A couple of minutes)

Fold in the chopped peanut butter cups.

That’s all there is to it.

Spoon into serving dishes and garnish with more chopped peanut butter cups if you like.  I did,  the more the merrier!  Refrigerate and cover until you are ready to eat it.

I served mine with a little chocolate wine.

I give this recipe out of 4……

artforeveryone1965

The Walking Artist

Don Charisma

because anything is possible with Charisma

Our Growing Paynes

A journey about cooking, traveling, gardening, and crafting.

Momoe's Cupboard

Low Budget Meals and Ideas

Cabana Boy Cleaning

Cleaning Tips,Recipes,Urban Farming

Share With Us @ Clouds N Cups

We Sell Fashion Accessories N Nail Art Decor But There Is Always An Extra CHEERS To Share...Who Says Beauty Is Only Skin Deep?

Eat.Well.

Weekend Cooking Adventures of Natalie Biggs

Disashi Soul

Labels are limitations. Dig deeper!

fadetheprompt

two girls cooking without recipes

Algarve Blog

Sharing the Algarve with you

Who I am

Still Trying to Figure Things Out

Gypsy Roller's Veggie Kitchen

Delicious meatless recipes straight from my kitchen in the Fraser Valley, British Columbia!

the chef mimi blog

so much food, so little time...

Sufey

Inhale Joy, Exhale Gratitude

Aly GarlicHands

Food porn and recipes for the foodie and garlic lover in us all