Appetizers

All posts in the Appetizers category

Baked Sweet Chili Chicken Wings

Published July 13, 2014 by thepinkgourmet

If you like Chicken Wings then this is a must try! Even though these are baked, they are crispy without all the extra fat! The sauce is amazing on the wings. The sauce is sweet with a little heat.  These would be great for an appetizer or for the main course if you added something else with them.  They are very easy to make.

051

Baked Sweet Chili Chicken Wings- Source

Prep time
15 mins
Cook time
60 mins
Total time
1 hour 15 mins
Author: Carla Cardello (www.chocolatemoosey.com)
Serves: 6 wing dings
Ingredients
  • 6 wing dings (drumettes and/or flats)*
  • 1 tablespoon vegetable oil
  • Salt and pepper to season
  • 1/4 cup water
  • 1/4 cup sweet chili sauce (homemade or store bought)
  • 2 tablespoons soy sauce
  • 3 garlic cloves, minced
  • 1/4 tsp ground ginger
Instructions
  1. Preheat oven to 400F. Line the bottom of a roasting pan or cookie sheet with foil. Place a roasting or cooling rack on top.
  2. In a medium bowl, toss together the wings, oil, salt and pepper. Place wings onto rack in the pan and bake 45-50 minutes until cooked through and skin is crispy.
  3. Meanwhile, make the glaze. In a medium saucepan, mix together the water, chili sauce, soy sauce, garlic, and ginger and bring to a boil. Reduce heat to low, stirring occasionally, until reduced to 1/4 cup, about 8 minutes. Let sit for 15 minutes to thicken slightly.
  4. When the wings are finished, toss into the glaze and serve.
  5. Optional: After tossing in the glaze, bake for an additional 8-10 minutes or until the glaze is lightly caramelized.
Notes
*Wing dings are chicken wings that are cut into three sections. If you cut the wings yourself, discard the tips and keep the drumstick and flat parts.
038
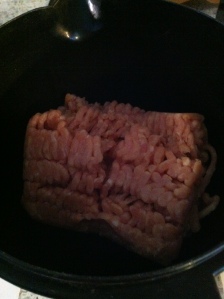
The first thing I did was marinate the chicken wings in a mixture of soy sauce and apple cider vinegar.  It did not say to do this, I just thought it would make the chicken a little more flavorful, which it did.  I did not measure the soy sauce and apple cider vinegar, I just used more of the vinegar than the soy sauce.  I left it in the marinade for about an hour and turned the chicken in the marinade about half way.
039
040
041
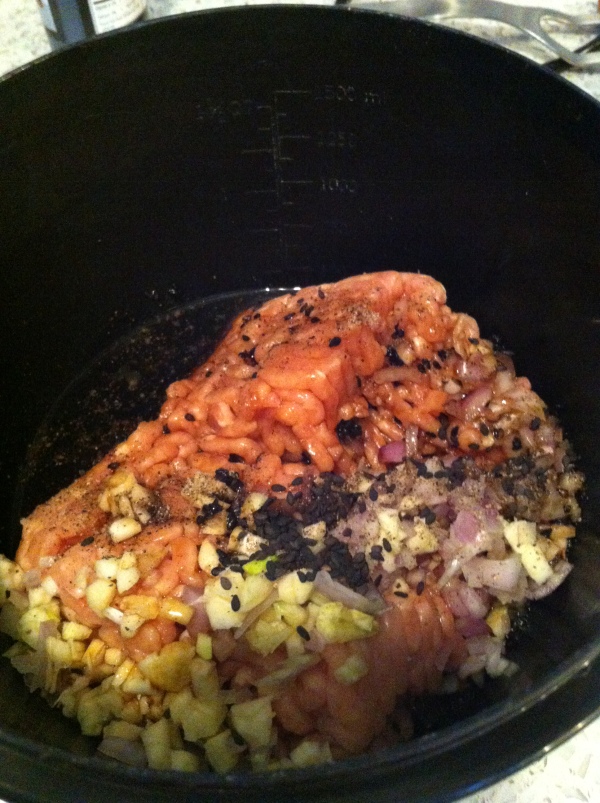
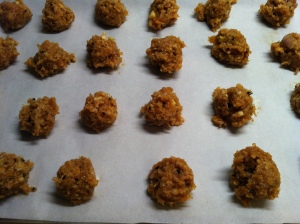
Pat the chicken wings with a paper towel when you take them out of the marinade. Put the chicken wings in a bowl with the salt, pepper, and oil. Toss till well coated.  Place a roasting or cooling rack on top of a foil lined cookie sheet or roasting rack. Place the wings onto the rack.
050
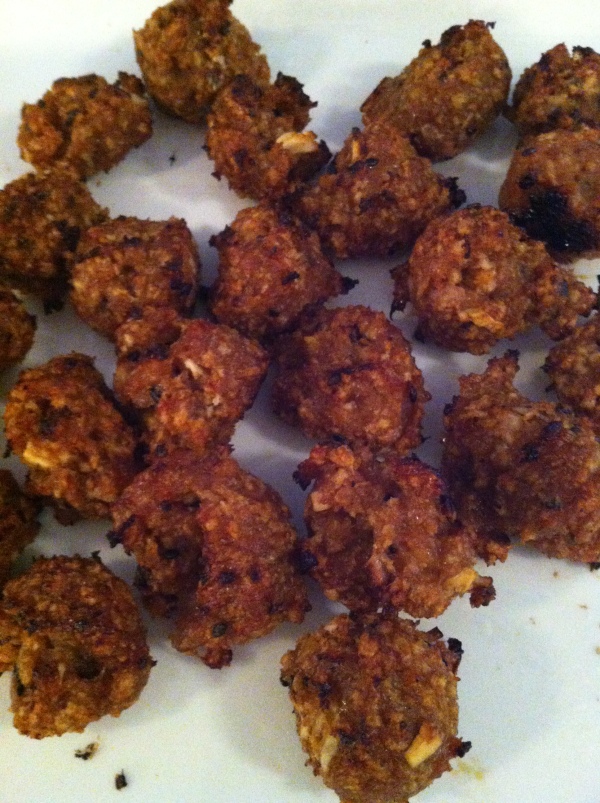
Bake at 400 degrees about 45-50 until cooked  through and skin is crispy. I turned my over about half way through the cooking time.
043
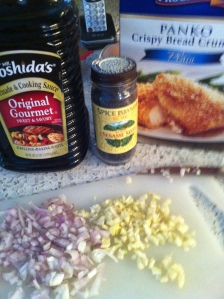
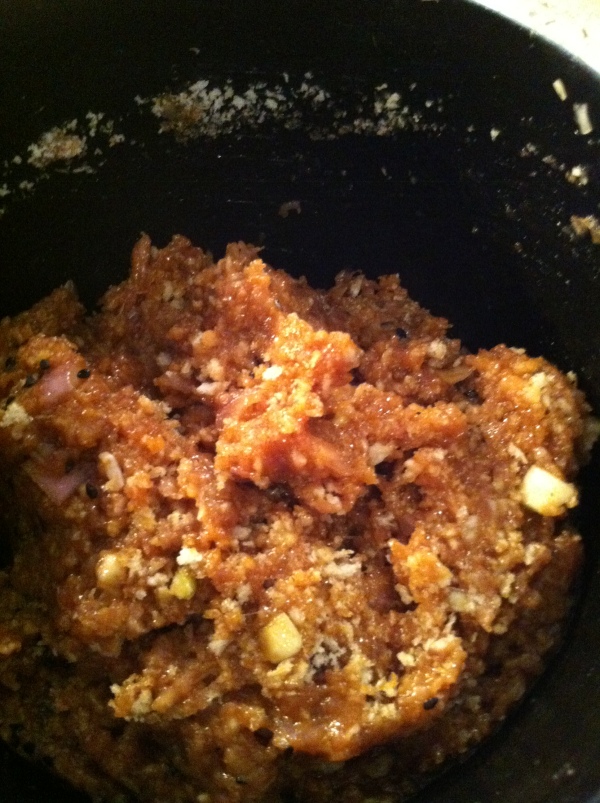
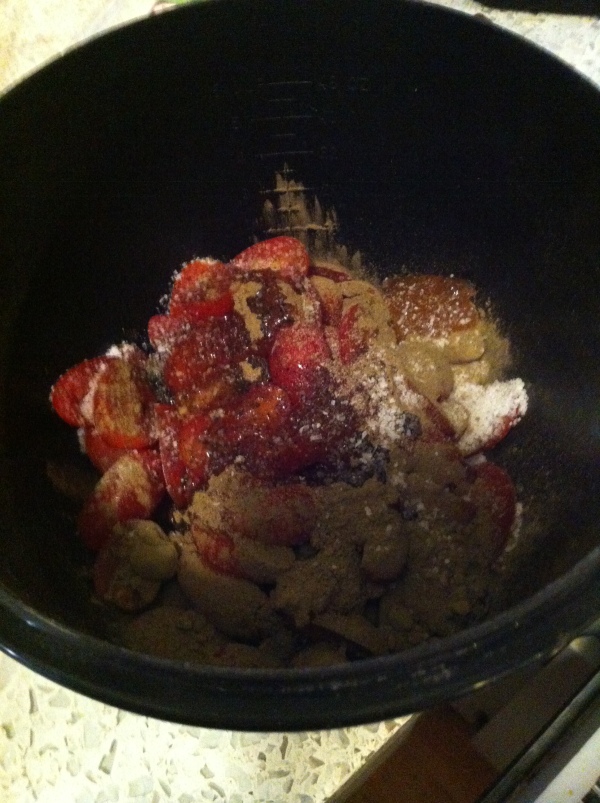
While the wings are baking start making the glaze.  This is what you need to make it.
044
046
047
048
049
Put the water, garlic, soy sauce, Sweet Chili Sauce, and ginger in a medium-sized pot. Bring this to a boil and reduce heat to low for about 8 minutes.  I made a mistake and bought the wrong Sweet Chili Sauce.  This one was kind of hot so I made some adjustments to it.  I added some ketchup, brown sugar and more water to get it to a taste I liked that was not too hot.  When it has reduced to the way you want it, turn it off and let it sit.  It will thicken as it cools.
052
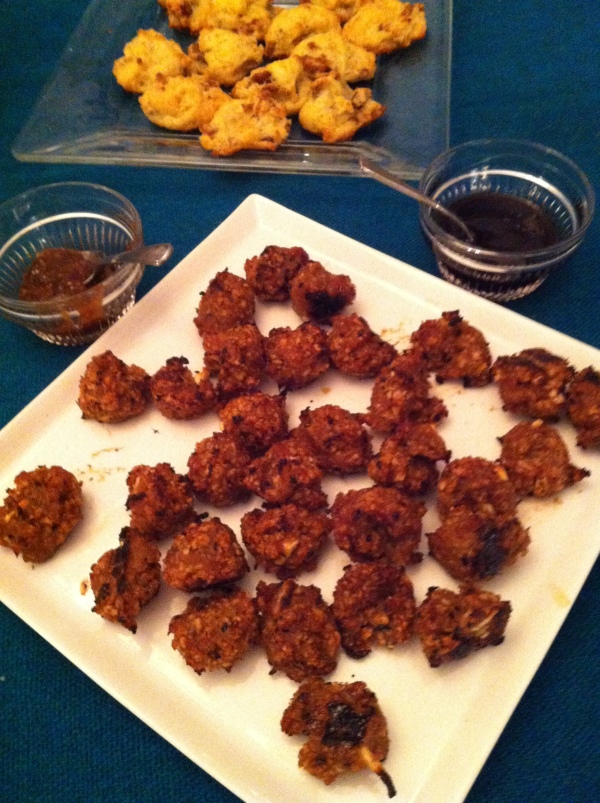
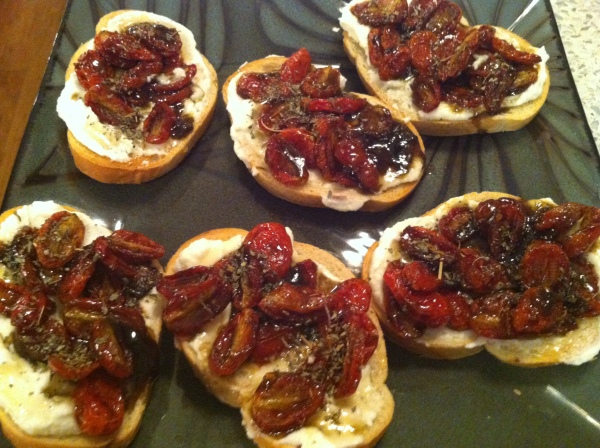
When the wings are done toss them in the glaze.   If you want put them back in the oven for about 8-10 minutes and they will start to caramelize!
053
Can you say yum, yum!  All I can say now is just enjoy them!  I bet you can’t help licking your fingers!
I give this recipe  plus out of 4…

Best Darn Ham Sandwiches Ever

Published July 23, 2013 by thepinkgourmet

These are truly amazing little sandwiches.  They are easy to make and have a great flavor.  What makes these different is the glaze you brush over the sandwiches.  These would be great for a sports party as an appetizer or at  a kids party as the main course. I had them for my dinner with a salad and some fruit. I think instead of ham you could use Turkey, wheat rolls, and any kind of cheese you like.

012

Best Darn Ham Sandwiches Ever

Source

Cook Time

Prep time: 1 hour 20 min
Cook time: 15 min
Ready in: 1 hour 35 min
Yields: 12

Ingredients

  1. You will need two 9 x 13 pans. Place the bottoms of 12 rolls in each pan. Place ham (about 2 shaved slices or so) on the rolls. Cut the cheese slices into 4 parts and place 2 small pieces on each sandwich. Put the dinner roll tops on.
  2. In a sauce pan, mix butter, Worcestershire sauce, onion powder, garlic powder and poppy seeds. Wait until all butter is melted and then brush the melted mixture over the ham sandwiches
  3. Cover with foil and let sit in fridge for 1 hour or over night. (If you want to bake them right away, you can also.) Preheat oven to 375 and bake for 15 minutes or until cheese is melted. Serve.

002

003

The first step I did was make the glaze that you brush over the sandwiches.  I did not use poppy seeds. Mix butter, Worcestershire sauce, onion powder, and  garlic powder together in a small saucepan till the butter melts.  I did this in the microwave.

005

006

007

008

Next put your sandwiches together.  I did use the Sweet Hawaiian Rolls. I spread a little bit of butter on mine first.  I also used honey ham which is what I like.  Add your ham and cheese. You can see I was very generous with my ham and cheese.

009

Brush the glaze over the sandwiches.  Here comes the important part.  Cover with foil and put into the refrigerator for 1 hour or overnight.

058

Bake in a 375 degree oven for about 15 minutes or until the cheese melts.  I baked mine with the foil on top for about 10 minutes and then uncovered them the rest of the cooking time.   I can tell you that you will Love these!!!!

I give this recipe plus out of 4……

Crostini with Peaches, Blue Cheese and Honey

Published June 21, 2013 by thepinkgourmet

Today I have another wonderful appetizer for you! This one has peaches, blue cheese and honey on a French baguette.  The flavors are perfect for the summer. This is very easy to make and would be perfect right before a summer meal.

016

Crostini with Peaches, Blue Cheese and Honey:

Source

(from Heather Christo’s Generous Table)

What it took for 12 crostini:

* 1 baguette, cut into 1/2-inch slices * 2 Tbs. olive oil * 1 clove garlic * 1- 2 peaches, pitted and sliced into thin wedges * 8 oz Cambozola cheese * about 2 Tbs. honey

Preheat oven to 400.

Arrange the baguette slices on a rimmed baking sheet. Drizzle the oil over the bread. Bake for 7 minutes, or until the toasts are lightly golden. Remove from the oven and rub each toast with the raw garlic clove. Arrange the peach wedges over the bread. I was able to get 2 little wedges per toast. Then divide the cheese over the peaches and place back in the oven for another 5 to 7 minutes, or until the cheese is melting and the peaches have softened.

Remove from the oven and drizzle with honey. Serve ‘em to only yourself!

008

The first thing you need to do is cut your baguette into 1/2 inch slices and drizzle them with olive oil.  Bake for about 5 minute till lightly golden.

009

011

I would not let my bread get this golden.  I left it in just a little too long.    Rub it with the cut garlic.

012

Add the peach slices on top of each toasted bread slice.

014

Add the blue cheese on top of the peaches. Place back in the oven for about 5 minutes or until the cheese has begun to melt and the peaches are softened.

017

This is what it looks like when it is ready.  Drizzle with honey. Bon Appetit!!

I give this recipe plus out of 4……

ROASTED TOMATO MINI PIES

Published June 20, 2013 by thepinkgourmet

If you are looking for a yummy appetizer and like tomatoes then this is the one for you.  The combination of the ricotta cheese, tomatoes and fresh basil fit the bill nicely. It also is very easy to make and does not take too much time.

011

ROASTED TOMATO MINI PIES

see the source for the complete recipe

001

The first thing I did was to cut the tomatoes in slices.

002

003

Then I mixed the ricotta cheese, part of the basil, grated parmesan cheese, and pressed garlic clove together in a small bowl. Set aside.

004

005

006

Next roll out your puff pastry into a square, cut it into 4 pieces, score it, bake it on a parchment lined pan for about 10 minutes.

007

Spread the ricotta cheese mixture on top of each piece.

008

Next put the sliced tomatoes on top and bake them for another 10-15 minutes.

011

You want the pastry golden and the tomatoes slightly roasted.  Then add the rest of the basil and drizzle with olive oil.  You will be delightfully surprised with the flavors.  This  is perfect for the summer with all the wonderful tomatoes around!

I give this recipe plus out of 4……

Chicken Meatball with Raspberry Chipotle Sauce

Published February 4, 2013 by thepinkgourmet

These are not your everyday  meatballs.  These are made with  ground chicken and baked, which make them healthier.  I really enjoyed the taste and the Raspberry Chipotle Sauce is really an added plus for these meatball.  It gives them a sweet and spicy flavor.  You can make these appetizer or main course size.  I think they would be great for a party!  They can be served hot or cold.

IMG_2884

Chicken Meatball with Raspberry Chipotle

Source

Recipe type: Entree, Appetizer
Author: Aletta van der Walt
Prep time: 10 mins
Cook time: 25 mins
Total time: 35 mins
Serves: 4 – 30
A great appetizer or main course. The sweet, smokey and spicy sauce is perfect with this low calorie chicken meatball.
Ingredients
  • 1 cup (250 ml) bread, torn into small bits – preferably French or Italian bread
  • 1/3 (80 ml) cup milk
  • 1 small onion, finely chopped
  • 2 small garlic cloves, minced
  • salt and pepper to taste
  • 2 tablespoons (30 ml) extra-virgin olive oil, divided
  • 1 large egg
  • 1 pound (450 g) ground chicken
  • 3 tablespoons (45 ml) finely chopped flat-leaf parsley
  • 6 tablespoons (90 ml) Raspberry Chipotle Sauce (I like
  • Fischer & Wieser Razzpotle Roasted Raspberry Sauce)
Instructions
  1. Soak the bread in the milk until softened. About 4 minutes.
  2. Preheat oven to 400°F with a rack in the upper third of the oven. Baking the meatballs in the top part of the oven help to create a nice brown outside.
  3. Heat half the oil in a large skillet. Cook onion, and garlic over medium heat until onion is softened, add the salt and pepper.
  4. Squeeze bread to remove excess milk, then discard milk. Lightly beat egg in a large bowl. Mix the egg, bread, ground chicken, and parsley. Divide chicken into 12 balls (24 pieces for appetizers) and form balls. Spray roasting dish with cooking-spray. Arrange meatballs in the pan.
  5. Brush the remaining oil over meatballs, bake in upper third of oven until meatballs are just cooked through, 15 minutes for cocktail meatballs and 20 to 25 minutes for full size meatballs.
  6. Pour the Raspberry Chipotle sauce over the meatballs while still hot.
  7. Serve hot or cold.

IMG_2867

IMG_2868

The first thing I did was cook the onions and garlic in half the olive oil until softened.  You want to add the salt and pepper to this.

IMG_2869

Put your ground chicken into a bowl.  I know this is not the most appetizing picture but it is what it is.

IMG_2870          IMG_2871

Next, lightly beat your egg.

IMG_2872

IMG_2873

Soak your bread in the milk until softened, about 4-5 minutes.  Make sure you use fresh French or Italian bread and tear it into small pieces.

IMG_2874

IMG_2875

Squeeze out the excess milk from the bread and add the bread to the ground chicken along with the egg and parsley.

IMG_2876

IMG_2877

Add your softened onions and garlic and mix until combined.

IMG_2878

IMG_2880

Roll into balls, place on a parchment lined roasting dish or roasting dish sprayed with cooking spray. Brush the rest of the olive oil over the meatball.  Bake in a 400 degree oven for about 15 minutes for appetizer size or 20-25 minutes for full size meat balls.

IMG_2882

IMG_2883

Remove from dish and place on a serving platter and pour over the Roasted Raspberry Chipotle Sauce. I think you will really enjoy these!!!

I give this recipe plus out of 4……

Baked Teriyaki Chicken Meatballs

Published December 27, 2012 by thepinkgourmet

These are a good substitute for regular meatballs.  The chicken and teriyaki are a great combination.  They are easy to make and you can either make  them regular size or appetizer size.  You can serve these with a sauce or not.  They are good either way.  I will definitely be making these again!

IMG_3144

Baked Teriyaki Chicken Meatballs

Source

Prep time:  20 minutes Cooking time:  40 minutes Yield:  60 meatballs
Ingredients 2-1/2 lbs. ground chicken 1 cup Veri Veri Teriyaki Sauce 2 scallions, minced 1 tablespoon black sesame seeds 2 cloves garlic, through garlic press or minced 1/4 teaspoon crushed black pepper 3/4 cup panko bread crumbs
Directions Preheat oven to 375°F.
Add all ingredients to large bowl and mix well.  Line a baking sheet with parchment paper. Form bite size meatballs and place on parchment paper. Bake for 40 minutes.  Transfer to serving tray with toothpicks. Optional – Serve with dipping sauces (as seen in photo above): Sweet Chili Sauce and/or Sesame Garlic Glaze.
IMG_3123               IMG_3124
This is all you need: ground chicken, panko crumbs, black sesame seeds, garlic, crushed black pepper, shallots or scallions and some sort of teriyaki sauce.  I say just use your favorite one.
IMG_3126
Put all the ingredients into a large bowl.
IMG_3127
Mix it up well!
IMG_3128          IMG_3129
Drop the meatballs onto a parchment lined baking sheet.  I made mine appetizer size. It says to bake them for about 40 minutes at 375 degrees.  I only needed about 20-25 minutes for the appetizer size.
IMG_3130
This is what they look like when they come out.  It doesn’t get any easier than that.  I don’t think you will be disappointed with the taste.   I hope you will enjoy them as much as I did!!!
I give this recipe plus out of 4……

Honey-Tomato Bruschetta with Ricotta

Published December 26, 2012 by thepinkgourmet

This is an amazing appetizer!  The combination of the roasted tomatoes, herbs, honey and ricotta cheese compliment each other very well.  This would be a great appetizer for a dinner party.  They are easy to prepare and would be really impressive to serve.  When I made these I did make a few minor substitutions, I don’t believe they altered the taste.

IMG_3158

Honey-Tomato Bruschetta with Ricotta

Source

2 pints cherry or grape tomatoes,  halved lengthwise

  1. Preheat the oven to 300°. Line a large rimmed baking sheet with parchment paper. In a large bowl, toss the tomatoes with the olive oil, honey, thyme leaves, salt and pepper. Scrape the tomatoes onto the prepared baking sheet and turn them cut side up. Bake the tomatoes for about 1 hour and 25 minutes, until they begin to shrivel and brown. Let cool.
  2. Preheat the broiler. Spread out the baguette slices on a baking sheet. Broil for about 30 seconds on each side, until the edges are golden brown.
  3. Spread the ricotta over the baguette slices and top with the slow-roasted tomatoes. Lightly drizzle the tomatoes with the buckwheat honey, sprinkle with the sliced basil and serve with additional buckwheat honey on the side.
Make Ahead The roasted tomatoes can be refrigerated for up to 2 days. Bring to room temperature before serving.

IMG_3148

The first step is to cut your grape or cherry tomatoes in half lengthwise.  I used grape tomatoes when I made these.

IMG_3149

Put your cut tomatoes, honey, thyme,  olive oil, salt and pepper into a bowl.  Make sure to coat all the tomatoes.  I used dried thyme instead of fresh thyme leaves.

IMG_3150

Pour the tomatoes onto a lined baking sheet making sure the tomatoes are cut side up.IMG_3152

Bake in a preheated 300 degree oven for about 1 hour to 1 hour 25 minutes. You want the tomatoes to begin to shrivel and brown. Let the tomatoes cool.

IMG_3153

After the tomatoes have cooled  some you are ready to finish putting the appetizer together. It goes quick at the point.  Cut your baguette into  1/2 inch thick slices, cut on the bias. I bought a  baguette that was already cut.

IMG_3154

Put the slices under the broiler for about 30 seconds on each side till edges are brown and it is a little brown on one side.

IMG_3155

Spread your ricotta cheese on each slice.  I had my ricotta at room temperature.

IMG_3156

On top of the ricotta cheese, spread your roasted tomatoes.

IMG_3157

Drizzle a little honey on top of the tomatoes.  It calls for buckwheat honey but I just used the clover.  Also sprinkle basil on the very top. I did not have fresh basil so I used dried.  These changes I made did not alter the taste.

IMG_3160

Serve these with a great bottle of wine or whatever you like to drink and you will have one amazing appetizer.  Bon Appetit!!

I give this recipe plus out of 4……

Mini Corn Dog Muffins

Published October 6, 2012 by thepinkgourmet

These are perfect for a Football Game Day!  If you like corn dogs then you will love these! They are also healthier since they are baked and not fried.  These are bite size and very addicting.  You can whip up a batch quickly and since they are bite size, they do not take long to bake.  I think these would also be great for a children’s party.

Mini Corn Dog Muffins

Source

Ingredients:

1/2 cup melted butter (or 1/4 cup butter + 1/4 cup unsweetened applesauce)

1/2 cup sugar

2 eggs

1 cup buttermilk

1/2 teaspoon baking soda

1 cup cornmeal

1 cup all purpose flour

1/2 teaspoon salt

8-10 all-beef hot dogs, cut into 1″ bites

Directions:

1. Preheat oven to 375 degrees. Combine butter and sugar in a bowl, and whisk to combine. Add eggs and whisk to incorporate. Add buttermilk and whisk to incorporate.

2. In a separate bowl, combine baking soda, cornmeal, flour, and salt, and stir to combine. Whisk into wet ingredients in two batches.

3. Spray a mini muffin tin with non-stick spray, and spoon 1 Tablespoon of batter into each mini muffin cup. Place one hot dog bite into the middle of each cup.

4. Bake for 8-12 minutes (oven temperatures vary), or until cornbread is golden brown. Cool in mini muffin tin for 5 minutes before serving. Store leftovers in the refrigerator, and re-heat for 20-30 seconds before serving.

The first step is to cut your hot dogs into 1 inch pieces.  I would not cut up the amount it says.  I had leftover hot dogs.  I would probably cut up 5 or 6 at first and then if you need more, then cut them up when you need them.


Combine your cornmeal, flour, salt and baking soda in bowl.  Use a spoon to mix this up.

Add your sugar to the melted butter.

Whisk until well combined.


Next add the eggs and whisk until well mixed.


Whisk in your buttermilk.  Please use buttermilk.  It gives these a great flavor!

Your batter will be thin at this stage.


Now you are ready to whisk in your dry ingredients.

Add about a tablespoon of batter to each mini muffin cup.  Make sure you greased or sprayed your muffin tins.

Put one hot dog bit in the middle of  each cup. Bake in a preheated 375 degree oven for about 8-12 minutes.  Mine took about 9 minutes.

Look how yummy these look!!!


You can serve these with ketchup, mustard or whatever condiments you enjoy!!  These will not last long, but if you have any left overs you can freeze them for another day!!

I give this recipe plus out of 4……

artforeveryone1965

The Walking Artist

Don Charisma

because anything is possible with Charisma

Our Growing Paynes

A journey about cooking, traveling, gardening, and crafting.

Momoe's Cupboard

Low Budget Meals and Ideas

Cabana Boy Cleaning

Cleaning Tips,Recipes,Urban Farming

Share With Us @ Clouds N Cups

We Sell Fashion Accessories N Nail Art Decor But There Is Always An Extra CHEERS To Share...Who Says Beauty Is Only Skin Deep?

Eat.Well.

Weekend Cooking Adventures of Natalie Biggs

Disashi Soul

Labels are limitations. Dig deeper!

fadetheprompt

two girls cooking without recipes

Algarve Blog

Sharing the Algarve with you

Who I am

Still Trying to Figure Things Out

Gypsy Roller's Veggie Kitchen

Delicious meatless recipes straight from my kitchen in the Fraser Valley, British Columbia!

the chef mimi blog

so much food, so little time...

Sufey

Inhale Joy, Exhale Gratitude

Aly GarlicHands

Food porn and recipes for the foodie and garlic lover in us all